16/02/2021
Skip all the text – go directly to the pattern…but comeback later to read it.
I wanted to make a farewell gift to one of our little one’s teachers, and I needed to make something small, because she told me that she was thinking about moving to another place… So… I finally had my excuse to make my own acorn (not that I needed an excuse, but it’s better when you have one).
And since I was making gifts, it seemed like a great idea to also create a pattern to gift to all of you, for your support, for being there and for understanding that I am always here despite not posting things every week.
I don’t know why, but I always feel guilty about not being active on social media, like I feel like I SHOULD. But the reality is that I can’t / don’t want to do it. I feel like every time I post something I lose a day (or several) and I get lost in the obsession (that I hate so much) of checking all the time how many likes 👍 I had or if someone else made a comment… arghhhhhh 😫.
I know very well that this is my fault (hello my brain!), and the moment I finally learn how to control it a little more I will start to publish more and be happy beyond the likes and comments… But, for now, posting something still makes me a little anxious (you have no idea how long it took me to post this 😅).
Maybe (I’m just thinking while I’m writing) I should post pictures of what I do and that’s it! No text, no over thinking… Maybe I’ll start doing that with the post for this pattern on Instagram / Facebook to see what happens… That could help…
And speaking of this, do you have any books on this subject to recommend me? I read “The book of over thinking” and the truth is that it is helping me a lot to recognize when I am worrying too much about things that I cannot control or change (past / future), and I would like to continue with another … So if you know of any, recommend!
But, please, do not hesitate for a second that every day I’m incredibly grateful for all of you… So… Thank you 😊
I’m so sorry for the long text! I have not had enough space to really write everything I want to write for a long time 😅 (another of the thing that don’t like about Instagram) and I got a bit out of hand… Now yes, a little more about the pattern and less about me…
:: The acorn symbolism ::
Before we start, let me tell you that this little one, in addition to being an elegant seed (shiny and soft with a little hat… So sophisticated) has many beautiful symbolisms.
– As the saying “Great oaks from little acorns grow” indicates that they are a symbol of perseverance, patience and prosperity.
– As a good luck symbol, acorns are said to protect one’s health. Carrying an acorn is believed to protect from illnesses, aches, and other pains. If you’re already ill, it is said to speed up the healing process and alleviate any pain. (A very good combo to have in your pocket taking into account today’s reality).
– The Norse god, Odin, hung himself from an oak tree to gain knowledge, so the acorn has come to symbolize wisdom.
– The Norse also believed that acorns could bring divine protection and placed them in the windows of their homes to ward off lightning.
– Acorns are thought to be a symbol of luck, prosperity and power in England. Dry acorns were carried by the English during the Norman Conquest to protect themselves (maybe hoping that they would make their conquerors more sympathetic toward them).
– Long before acorns were considered good luck, they were associated with magic between two witches. When passing each other in the woods, witches would hand each other acorns to let one another know who they were and that they were safe in one another’s company. (I don’t know if you guys felt the same, but the idea of someone telling you “you’re safe with me, I’ll take care of you” made my heart smile and my eyes fill with tears. Maybe because in these modern times of social media you feel that you cannot be completely yourself and that you “need” to be a happier version of yourself, sociable and friendly… And having people like that in your life, with whom you can feel and be just you… It’s something to really cherish).
And another thing that I love about this talisman is that it is not something that has to be bought, but something that can be found in the wild, that is fun to gather and that you can take it with you or make beautiful ornaments for your home.
And if you don’t have any oak nearby… Well… Now you can make this little crochet acorn.
I want to make little oak leaves for this acorn (and in my mind I already know exactly how I want to make them), but I really need to continue with my other patterns and if I start making those leaves I will be taking time out, again, from this other pattern that I’ve been working for so long and I’m about to finish… And I’m pretty sure this little pattern was an excuse to not finish it for fear of failure (thanks brain again…you are awesome /s).
So I’m not going to give my brain any more excuses and will make the leaves once the other pattern is finished.
Enough talking please! I just did what I hate about recipe blogs… you need to go down and dooooown through story texts and zarazas to finally find the recipe… But.. Hey! At least I don’t have advertisements in the middle of all this text 😬.
Ah! And speaking of the devil (advertising), I chose not to put advertisements on my site because I find them annoying and intrusive … But if you are interested in helping me continue creating or prefer the convenience of PDFs, you can buy these same instructions, at a symbolic price, in my shop on Etsy (here) or Ravelry (here).
And now yes, I will leave you with the acorn pattern … Thanks for your patience and for always being there…
Love you! Paula
:: Acorn charm free crochet pattern ::
Materials, tips and instructions.
Yarn and hook
You have 2 options to make your little acorn (well, that’s not completely true, you can make it however you want, but I make these 2, you can experiment with whatever yarn or crochet hook you want).
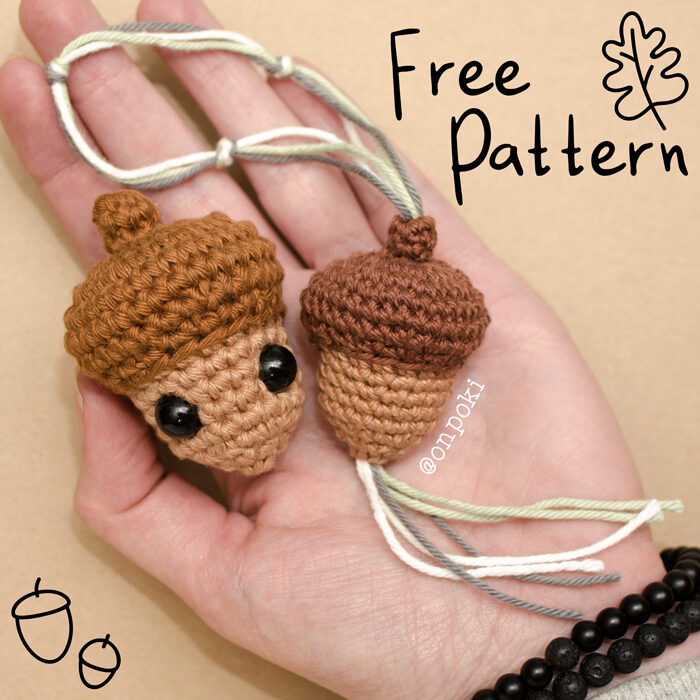
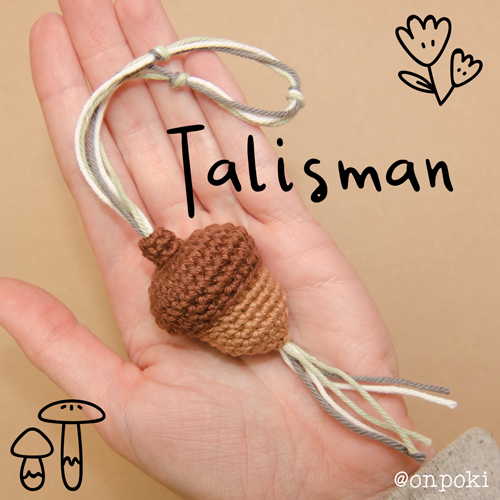
I made the smallest with the cord, which we will call from now on “Charm”, with cotton DK weight yarn (AKA double knitting / light / 3 / light worsted / 8 ply) with a 2.5 mm needle. I used very little of each of the colours (so I don’t think it necessary to put how many grams of each one I use) and I got an acorn of 5 cm (2 inches) high plus the threads will be more or less 22 cm (8 inches) long.
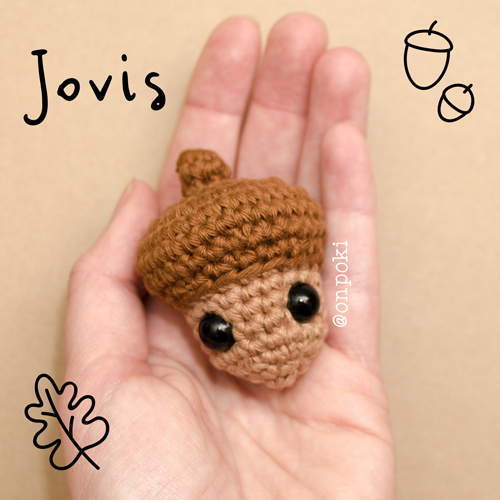
The little one with the sparkly eyes, let’s call him “Jovis”, was made with Aran weight yarn (AKA medium / 4 / 10 ply / worsted / Afghan) with a 3 mm crochet hook (US C2 / UK-CAN 11). And the same, very little of each colour, and I got a 6 cm (2.5 inches) high acorn.
Tienen 2 opciones para hacer esta pequeña bellota (bueno, eso no es cierto, pueden hacerla como quieran, pero yo hice estas 2, ustedes pueden experimentar con los hilos y agujas que quieran).
The rest…
Eyes (if you want to put eyes on it): 10 mm safety eyes if you are using Aran weight yarn. If you are going to use another yarn weight change to an eye size that fits that yarn.
Filling: Polyester fibre (wadding, pillow filling).
Yarn needle: To finish the acorn and insert the threads.
Row counter: It will really help you to keep track of how many rounds you have worked… Or you can simply use a paper and a pen… If you are easily distracted, like me, I really recommend you to get one.
Stitch markers: When making amigurumis in a spiral (continuous rounds) it is pretty easy to lose track of the beginning of the round, so I strongly recommend using any kind of stitch markers, bobby pins or a scrap of contrasting yarn will work perfectly fine.
Extra instructions
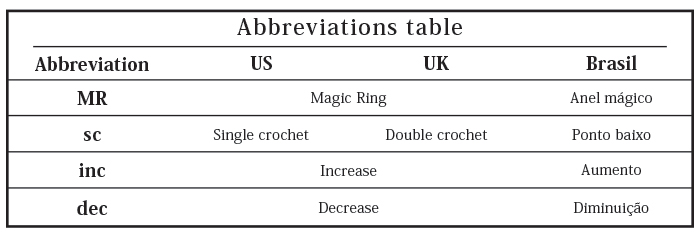
- Brackets [ ]
Repeat the instructions inside the brackets the number of times indicated by the number at the end.
Ex: [6 sc, 3 inc]x 6 means that we will have to do the combo of 6 single crochet and 3 increases 6 times. And since we are here, 3 inc means that we will have to make 1 increase in each of the following 3 stitches. - Parentheses ( )
The number inside the parentheses is the number of stitches you should have at the end of the round.
Ex: [2 sc, 2 inc]x 2 (12) means that we should have 12 stitches in total at the end of that round.
This pattern is made in a continuous spiral, you do not need to close every round at the end.
:: Pattern ::
* Start with the yarn you chose for the top (hat, dome) *
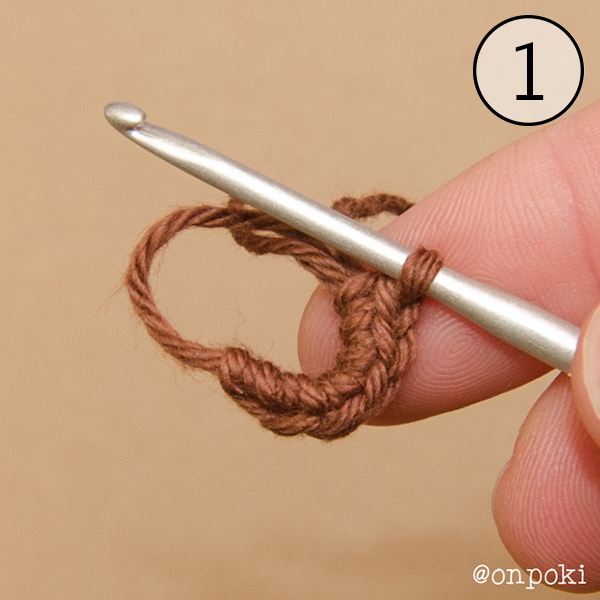
1) MR 6 sc (6)
Don’t close the magic ring too tight -Pictures 1 and 2- so you can get the thread through the hole to make the charm… Or a hanging Jovis
2-3) 6 sc (6)
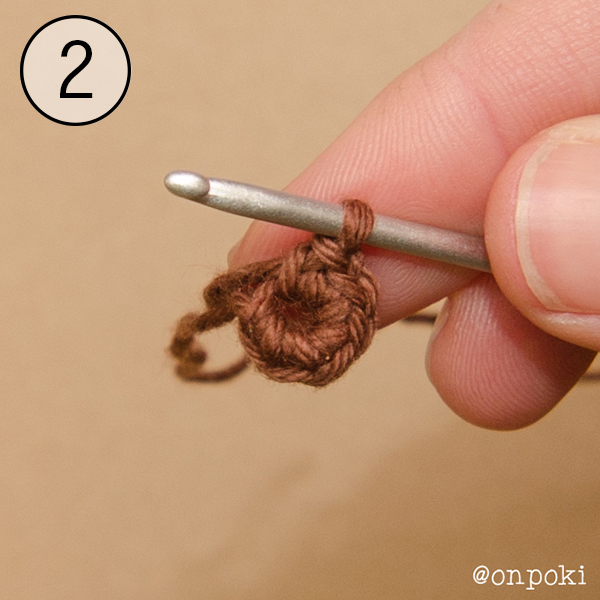
Work all the stitches of the next round in the front loop only -Picture 3–. (Front loop and back loop).
4) 6 inc (12)
Continue working all stitches in both loops.
5) 12 inc (24)
6) [2 sc, 1 inc]x 8 (32)
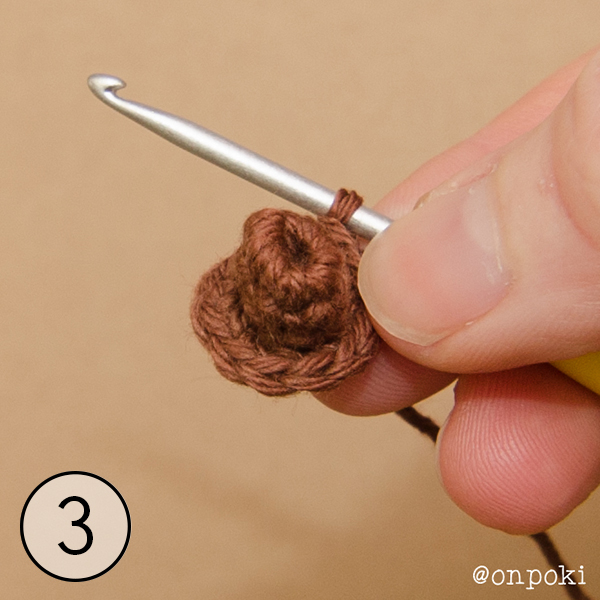
7-8) 32 sc (32) -Picture 4-
9) [6 sc, 1 inc]x 4 (28)
10) [1 dec, 1 sc]x 8, work 2 dec more (18)
* Change to the colour of the bottom of our acorn * (Color change)
Work all the stitches of the next round in the back loop only.
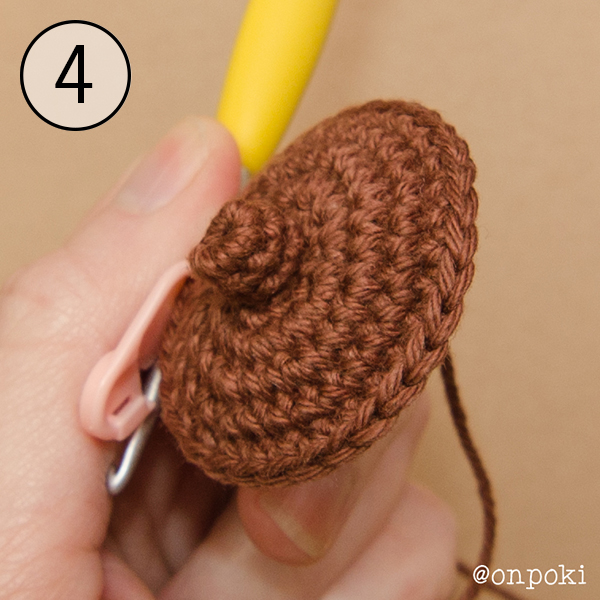
11) 18 sc (18) -Picture 5-
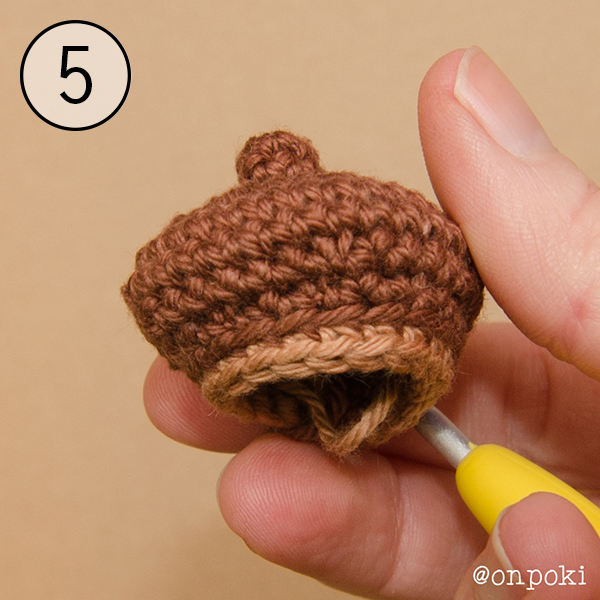
If you want your acorn to be a charm, now would be the time to prepare and insert the threads.
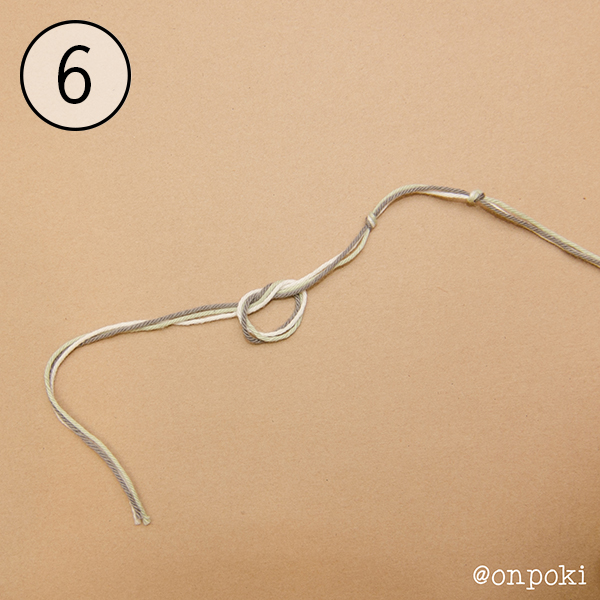
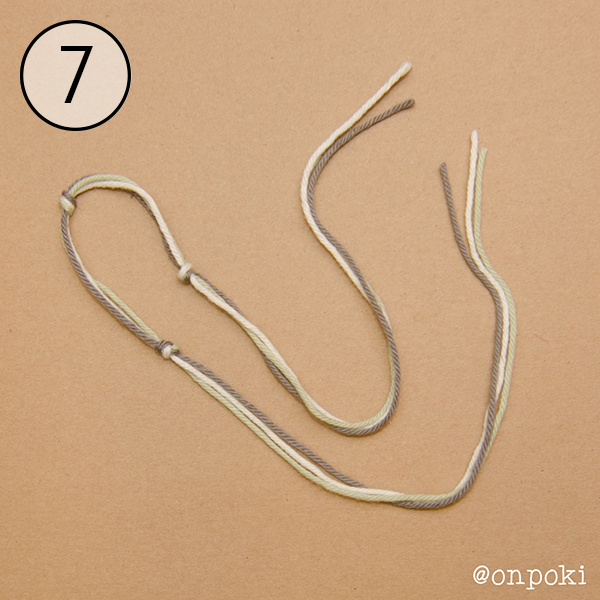
- Cut 3 thread of 70 cm (27.5 inches) long (I chose to make it with 3 threads of different colours). Make a knot in the middle and another knot on each side -Pictures 6 and 7-.
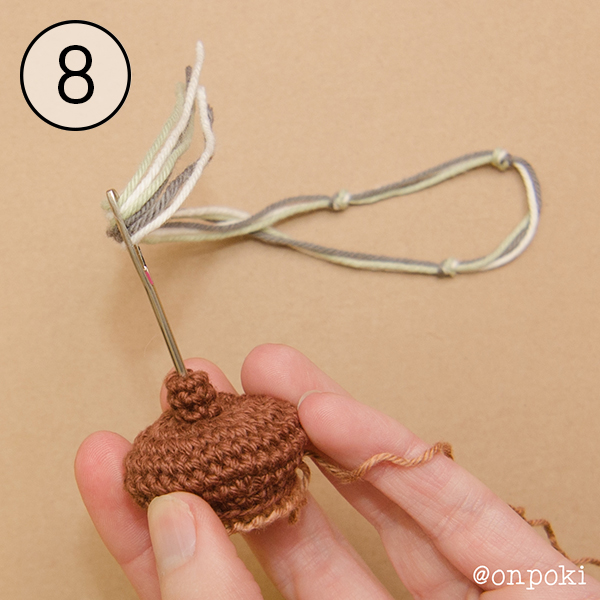
- With the help of a wool needle, insert it through the little hole we left in our MR at the beginning -Picture 8-.
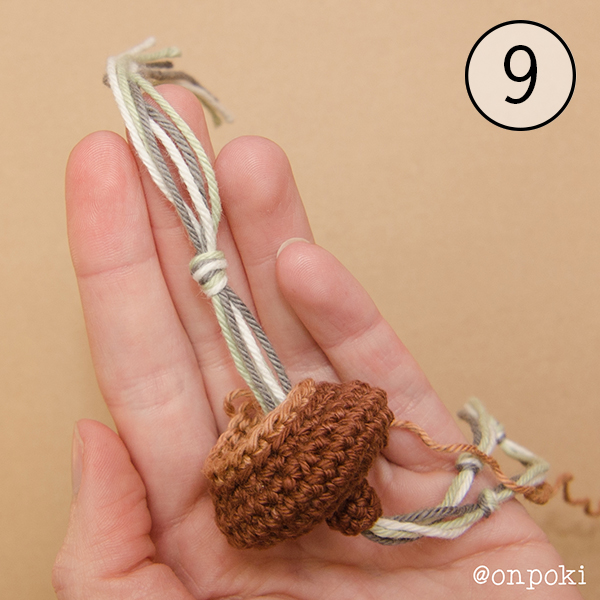
- Make a knot joining the 2 ends of the threads -Picture 9-.
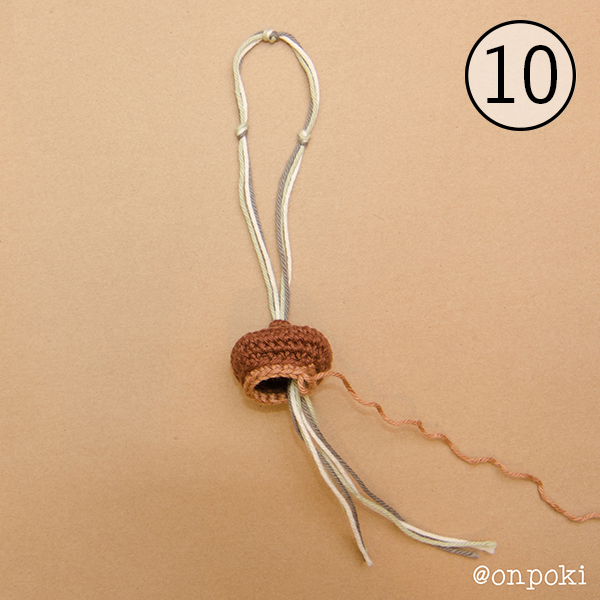
- Pull the threads from the top until it is locked (the knot that we just made does not have to be able to pass through the MR) -Picture 10-. When the acorn is finished we will trim the end of the threads to the length we want.
Continue working all stitches in both loops.
12-15) 18 sc (18)
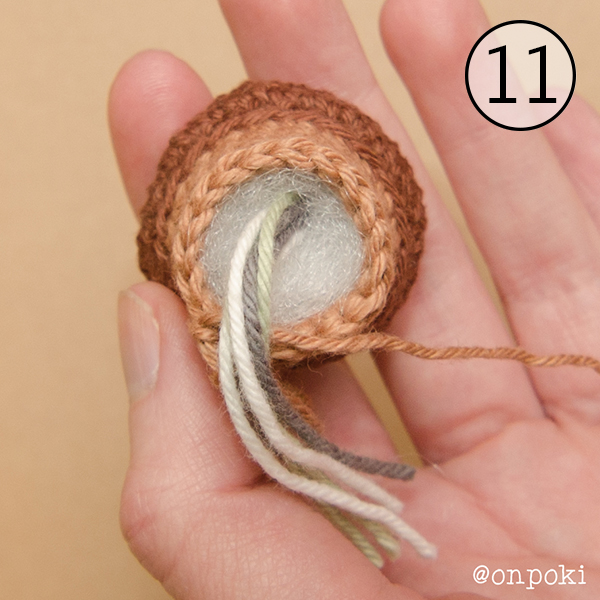
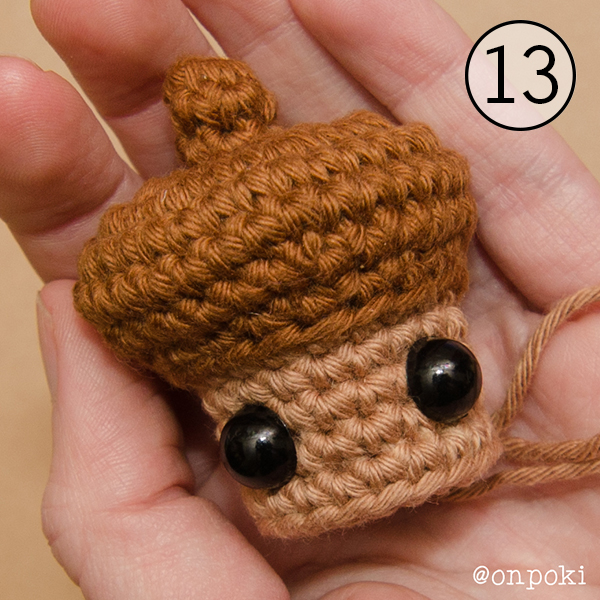
Start filling the acorn around the threads -Picture 11-. If you are going to add eyes just fill the upper part of the acorn (around the threads).
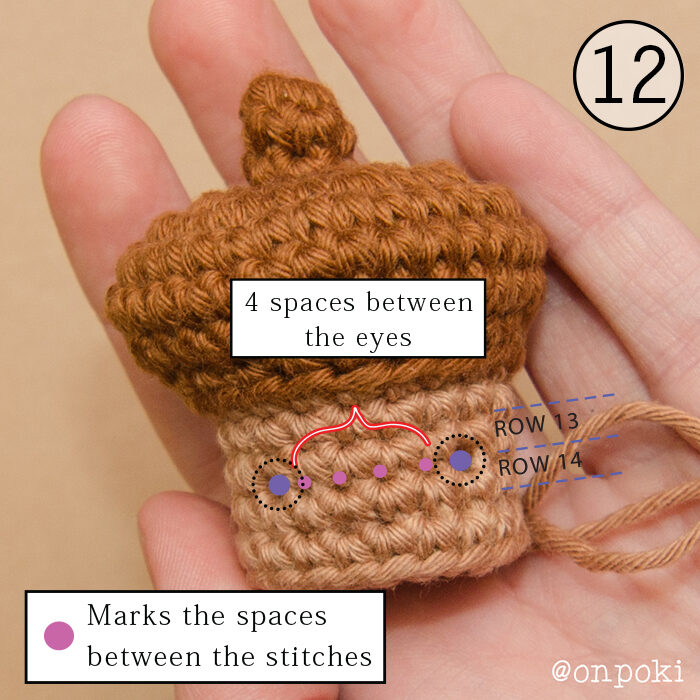
To add the eyes, insert them between rows 13 and 14, leaving 5 spaces between them -Picture 12-.
Let’s finish our acorn…
16) [1 sc, 1 inc]x 6 (12)
17) [1 inc, 1 sc]x 4 (8)
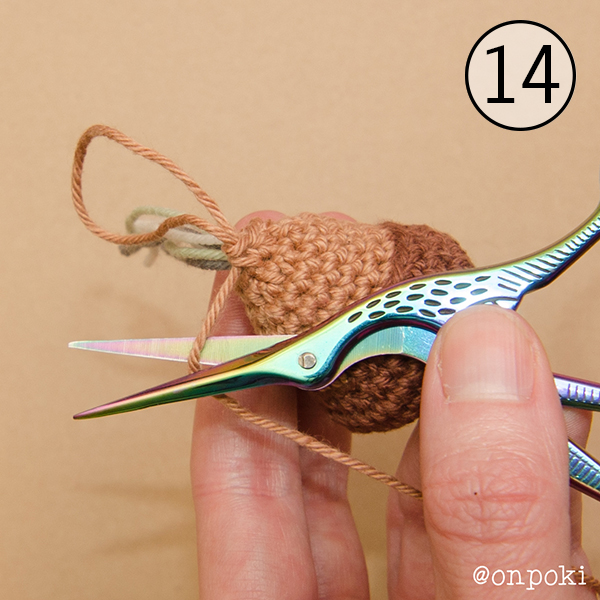
Finish filling your acorn, cut the thread leaving it long enough to close our amigurumi and hide the thread inside (leaving the other threads outside). -Picture 14-.
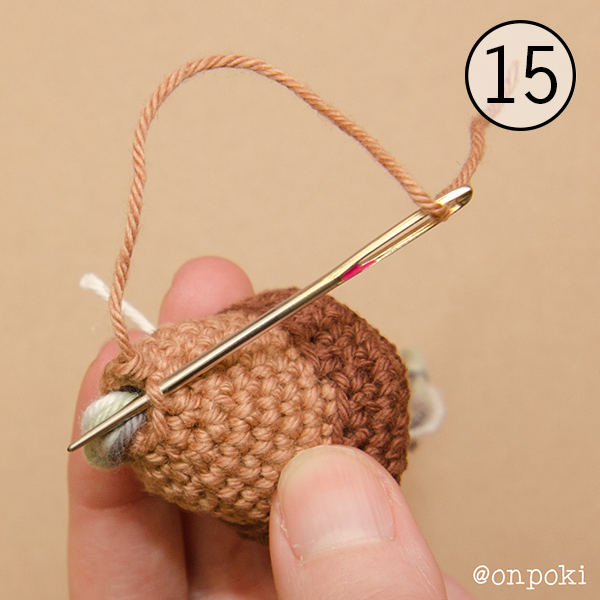
With the help of a wool needle insert your needle under every front loop from the last round, from the outside to the inside -Picture 15-.
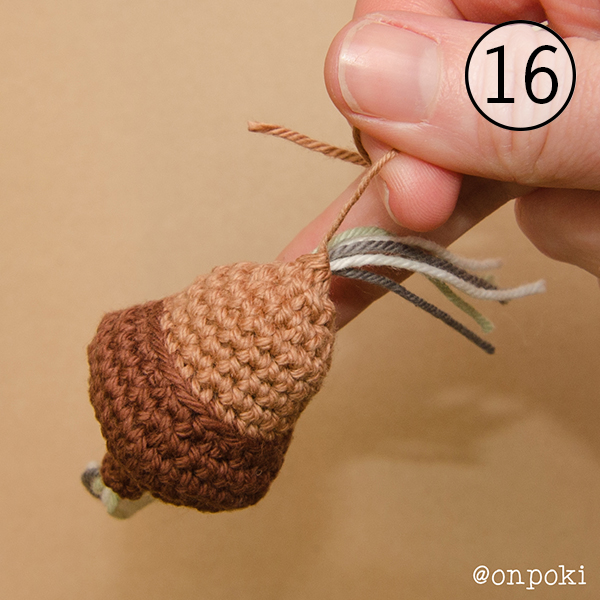
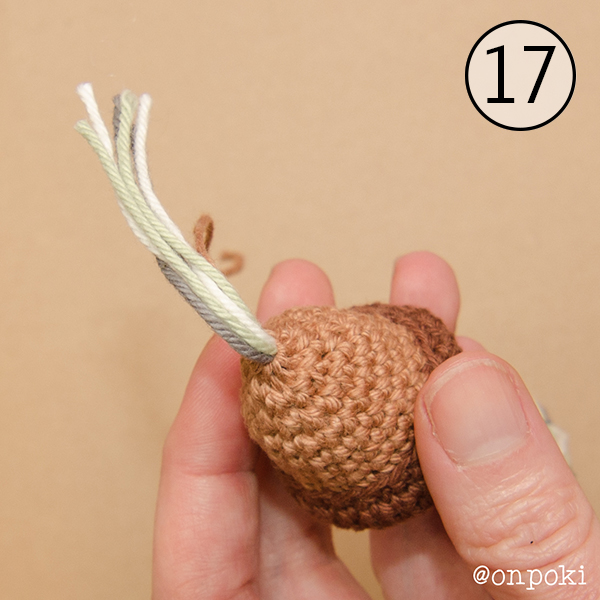
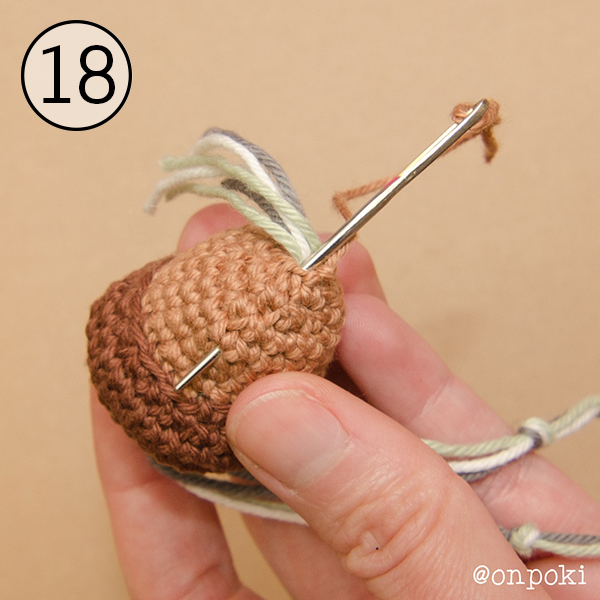
Pull the yarn tight to finish closing it -Pictures 16 and 17-. Secure the thread with a knot and lose it inside the acorn -Picture 18-.
That’s it!
Your little acorn is finished!
I hope you had fun making it ^_^
I would love to see how they look! If you want, you can share it on Instagram naming me with @onpoki and/or with the hashtag #onpoki. You can also tag me on Instagram or Facebook with @onpoki.
Thank you so much for choosing one of my patterns. You made me really happy.
Copyright information of this pattern
© 2021 ONPOKI – Paula Fuentes – All rights reserved. This pattern is FOR PERSONAL USE ONLY! The pattern (or parts of it) may not be reproduced, distributed or resold, translated, published, altered, shared or posted (for sale or free) over the internet or offline.
You are welcome to sell items from my PDF patterns provided that they are handmade by yourself, and you give credit to the designer.
Please include a note about the item being an “Onpoki design” on the tag (at a craft fair) or/and a link to my shop “onpoki.etsy.com” when you sell these items on the Internet.
THANK YOU FOR CHOOSING ONE OF MY PATTERNS AND FOR RESPECTING MY WORK.
¿How to buy the PDF?
If you are interested in obtaining this guide, please click on any of the 2 links below. ¡Thank you!
BUY IT ON MY RAVELRY SHOP
- I learned about the acorn “powers” thanks to this sites
https://www.invaluable.com/blog/good-luck-charms
https://www.thebalanceeveryday.com/lucky-charms-to-attract-good-luck-895277