
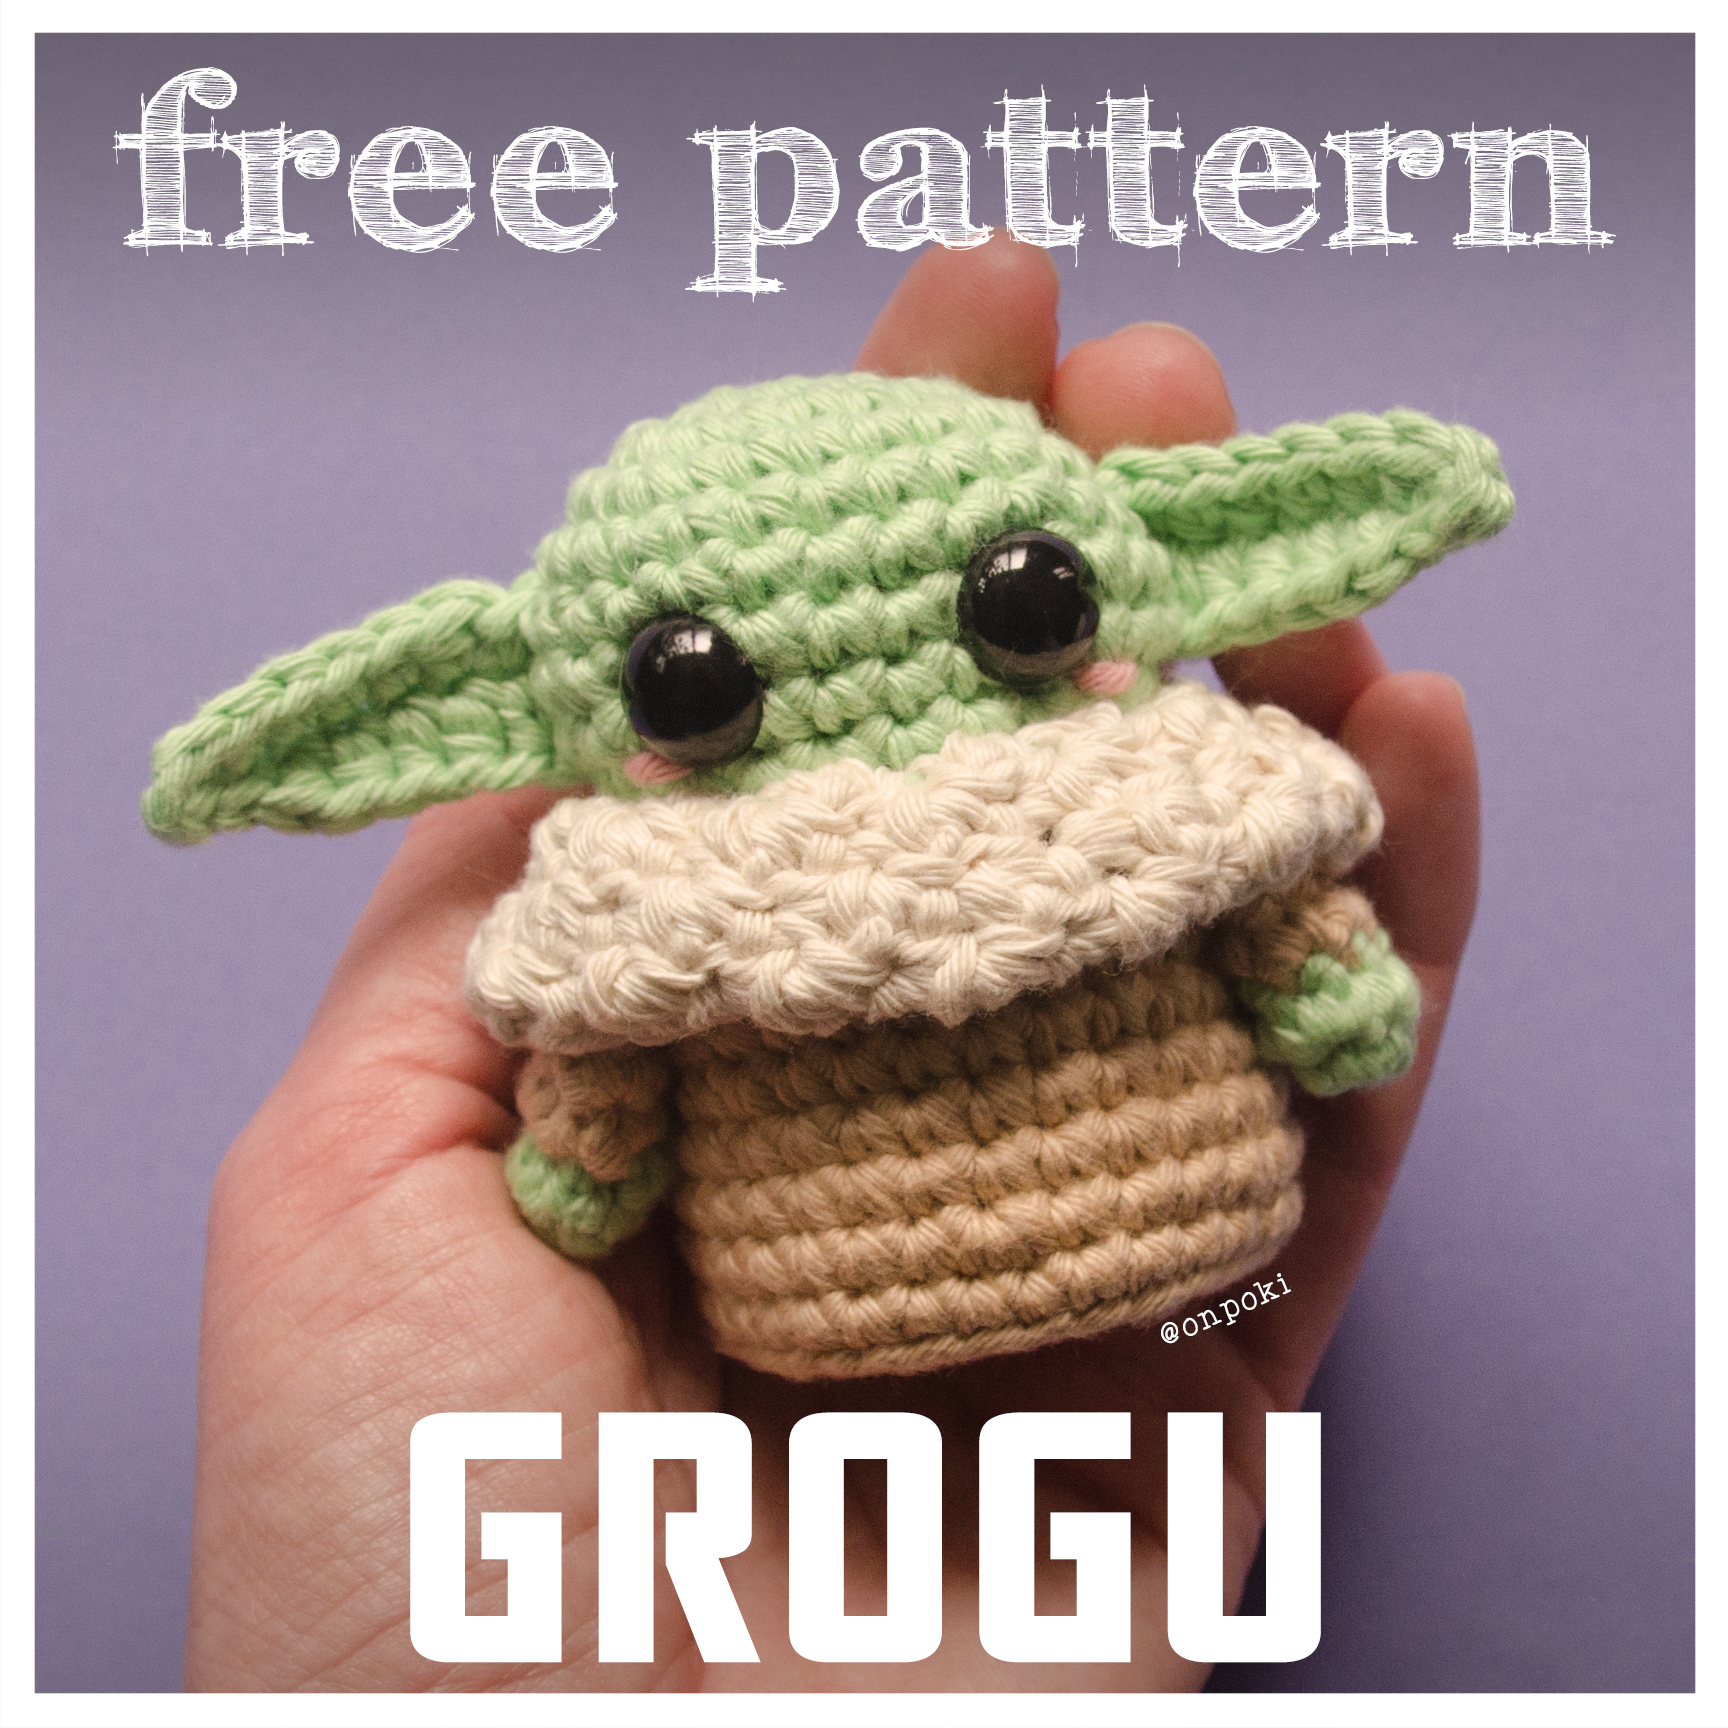
Free Grogu (Baby Yoda) Crochet Pattern – Amigurumi inspired by The Mandalorian
01/05/2025
About this pattern
This free Grogu amigurumi pattern is inspired by the little green hero from The Mandalorian. If you’re a Star Wars fan and love crocheting amigurumis, you’ll enjoy making your own Baby Yoda.
About a year ago, I said this free amigurumi pattern of Grogu was almost ready to publish… and then I disappeared for a while. Unexpected things happened in my life and my family’s, and that spark I usually have for creating just faded. I couldn’t make anything… I could only see what was wrong.
It took us a while, but little by little, we started finding our way back… one step at a time. Things aren’t perfect, and maybe they don’t need to be. I’m learning to keep creating even when everything around me isn’t in balance, which I find really hard because I usually need things to feel “in order” to function properly… which is pretty ironic, since my mind (and my room, and my stuff) are usually a total mess 😅. And now, I finally feel that spark coming back, and I hope I can start bringing to life all those ideas waiting in notebooks… and in my head.
And if you don’t know who this adorable little creature is, Grogu (also known as The Child) comes from the Star Wars universe, introduced in the series The Mandalorian. You can read more about him on the official Star Wars website.
But if you like step-by-step pictures (like I do), I also made a PDF version filled with detailed images, explained in my usual style. You can find it on my site for a symbolic price. The link is just below.
I really hope you enjoy bringing this little one to life. Thank you for your patience… and for still being here. May the yarn be with you ✨
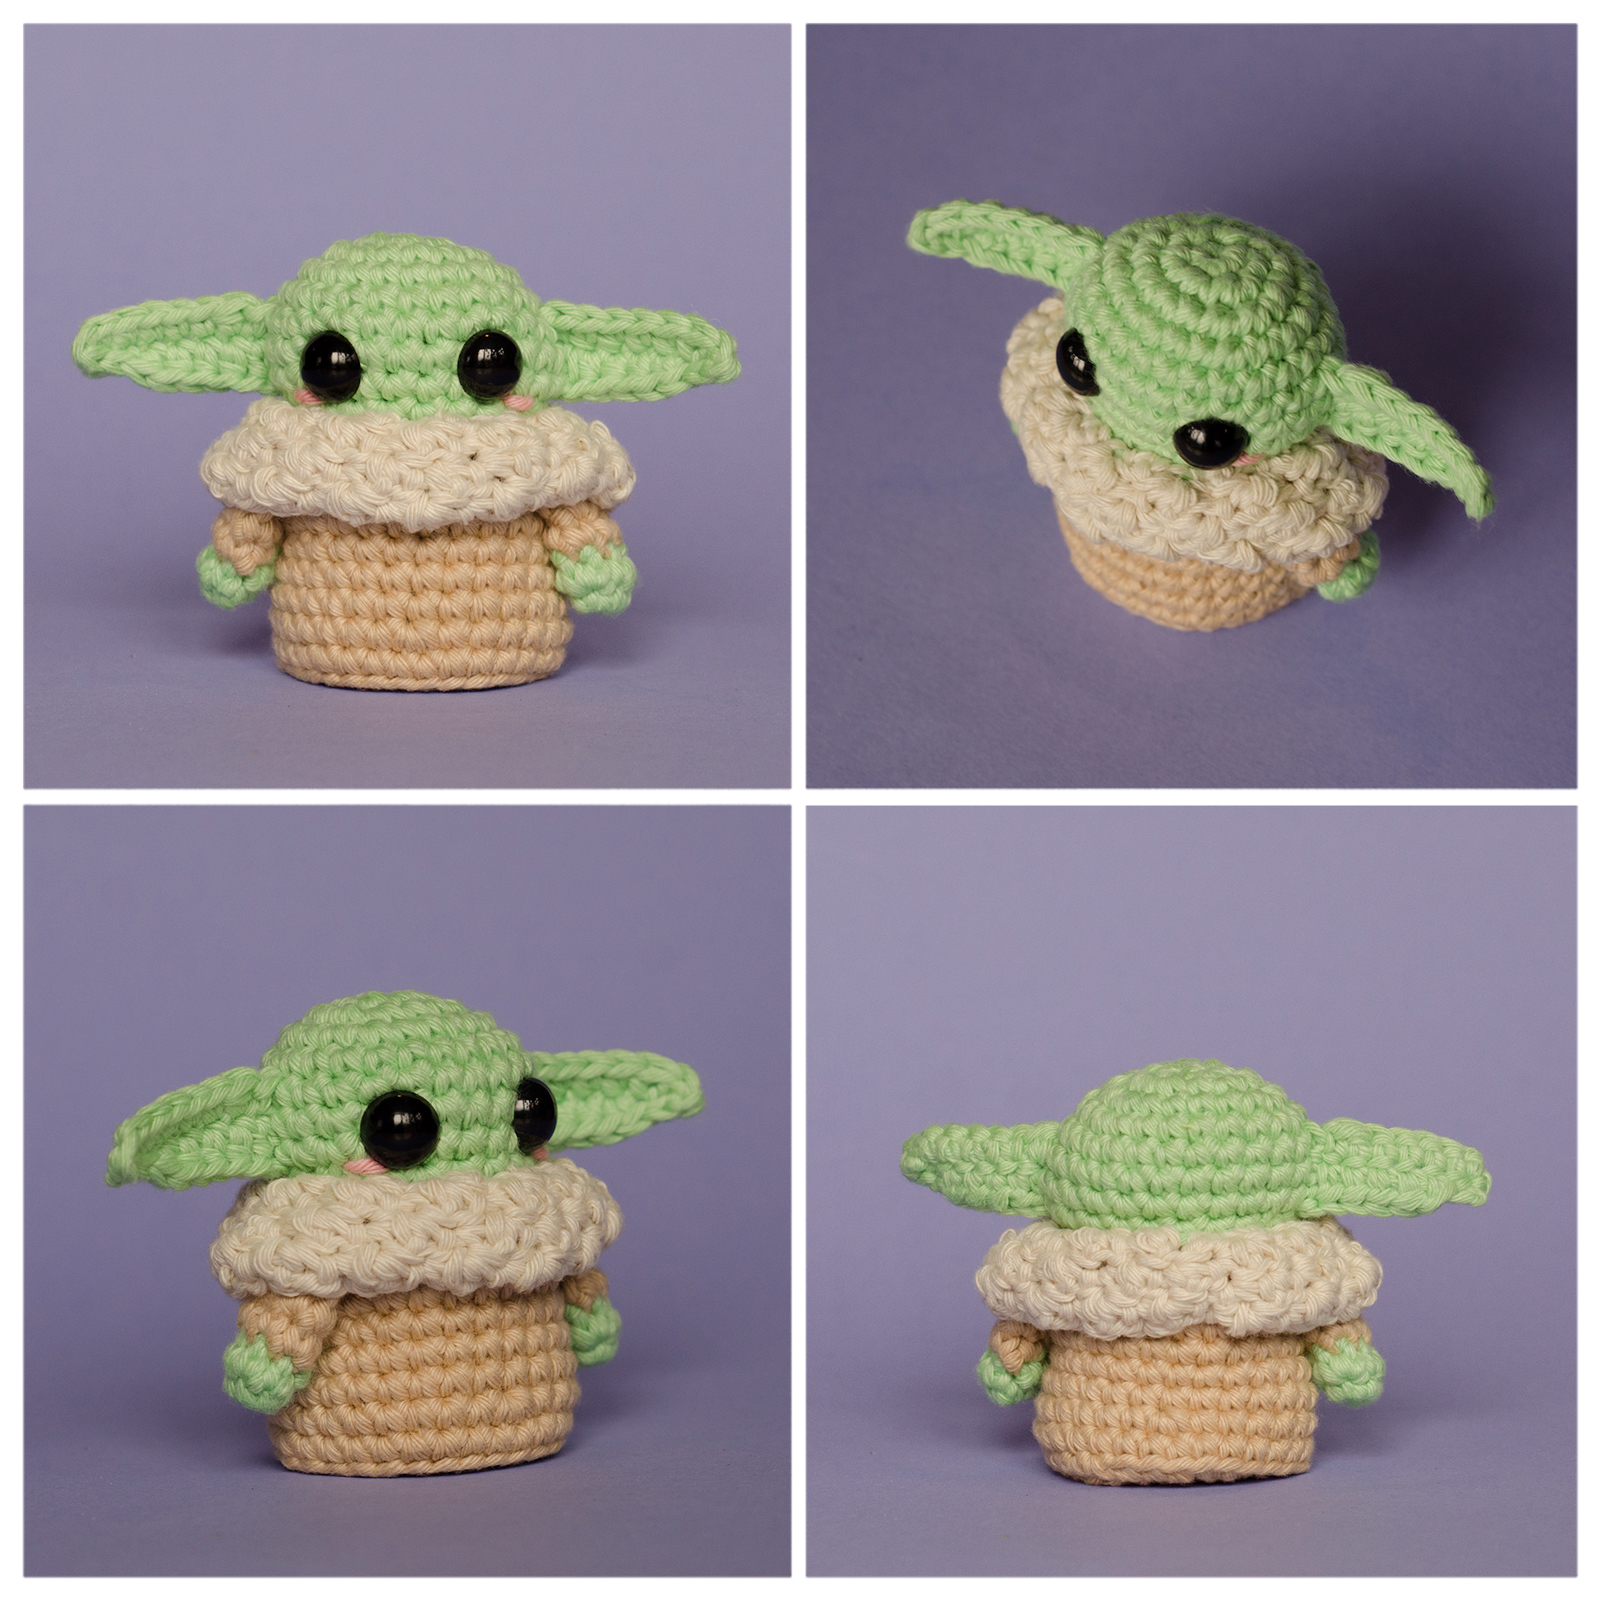
What you’ll be making — Grogu amigurumi from all angles
You can also make this pattern using chenille yarn for a softer, fluffier result ☁️
Here’s how it looks compared to the original cotton version:
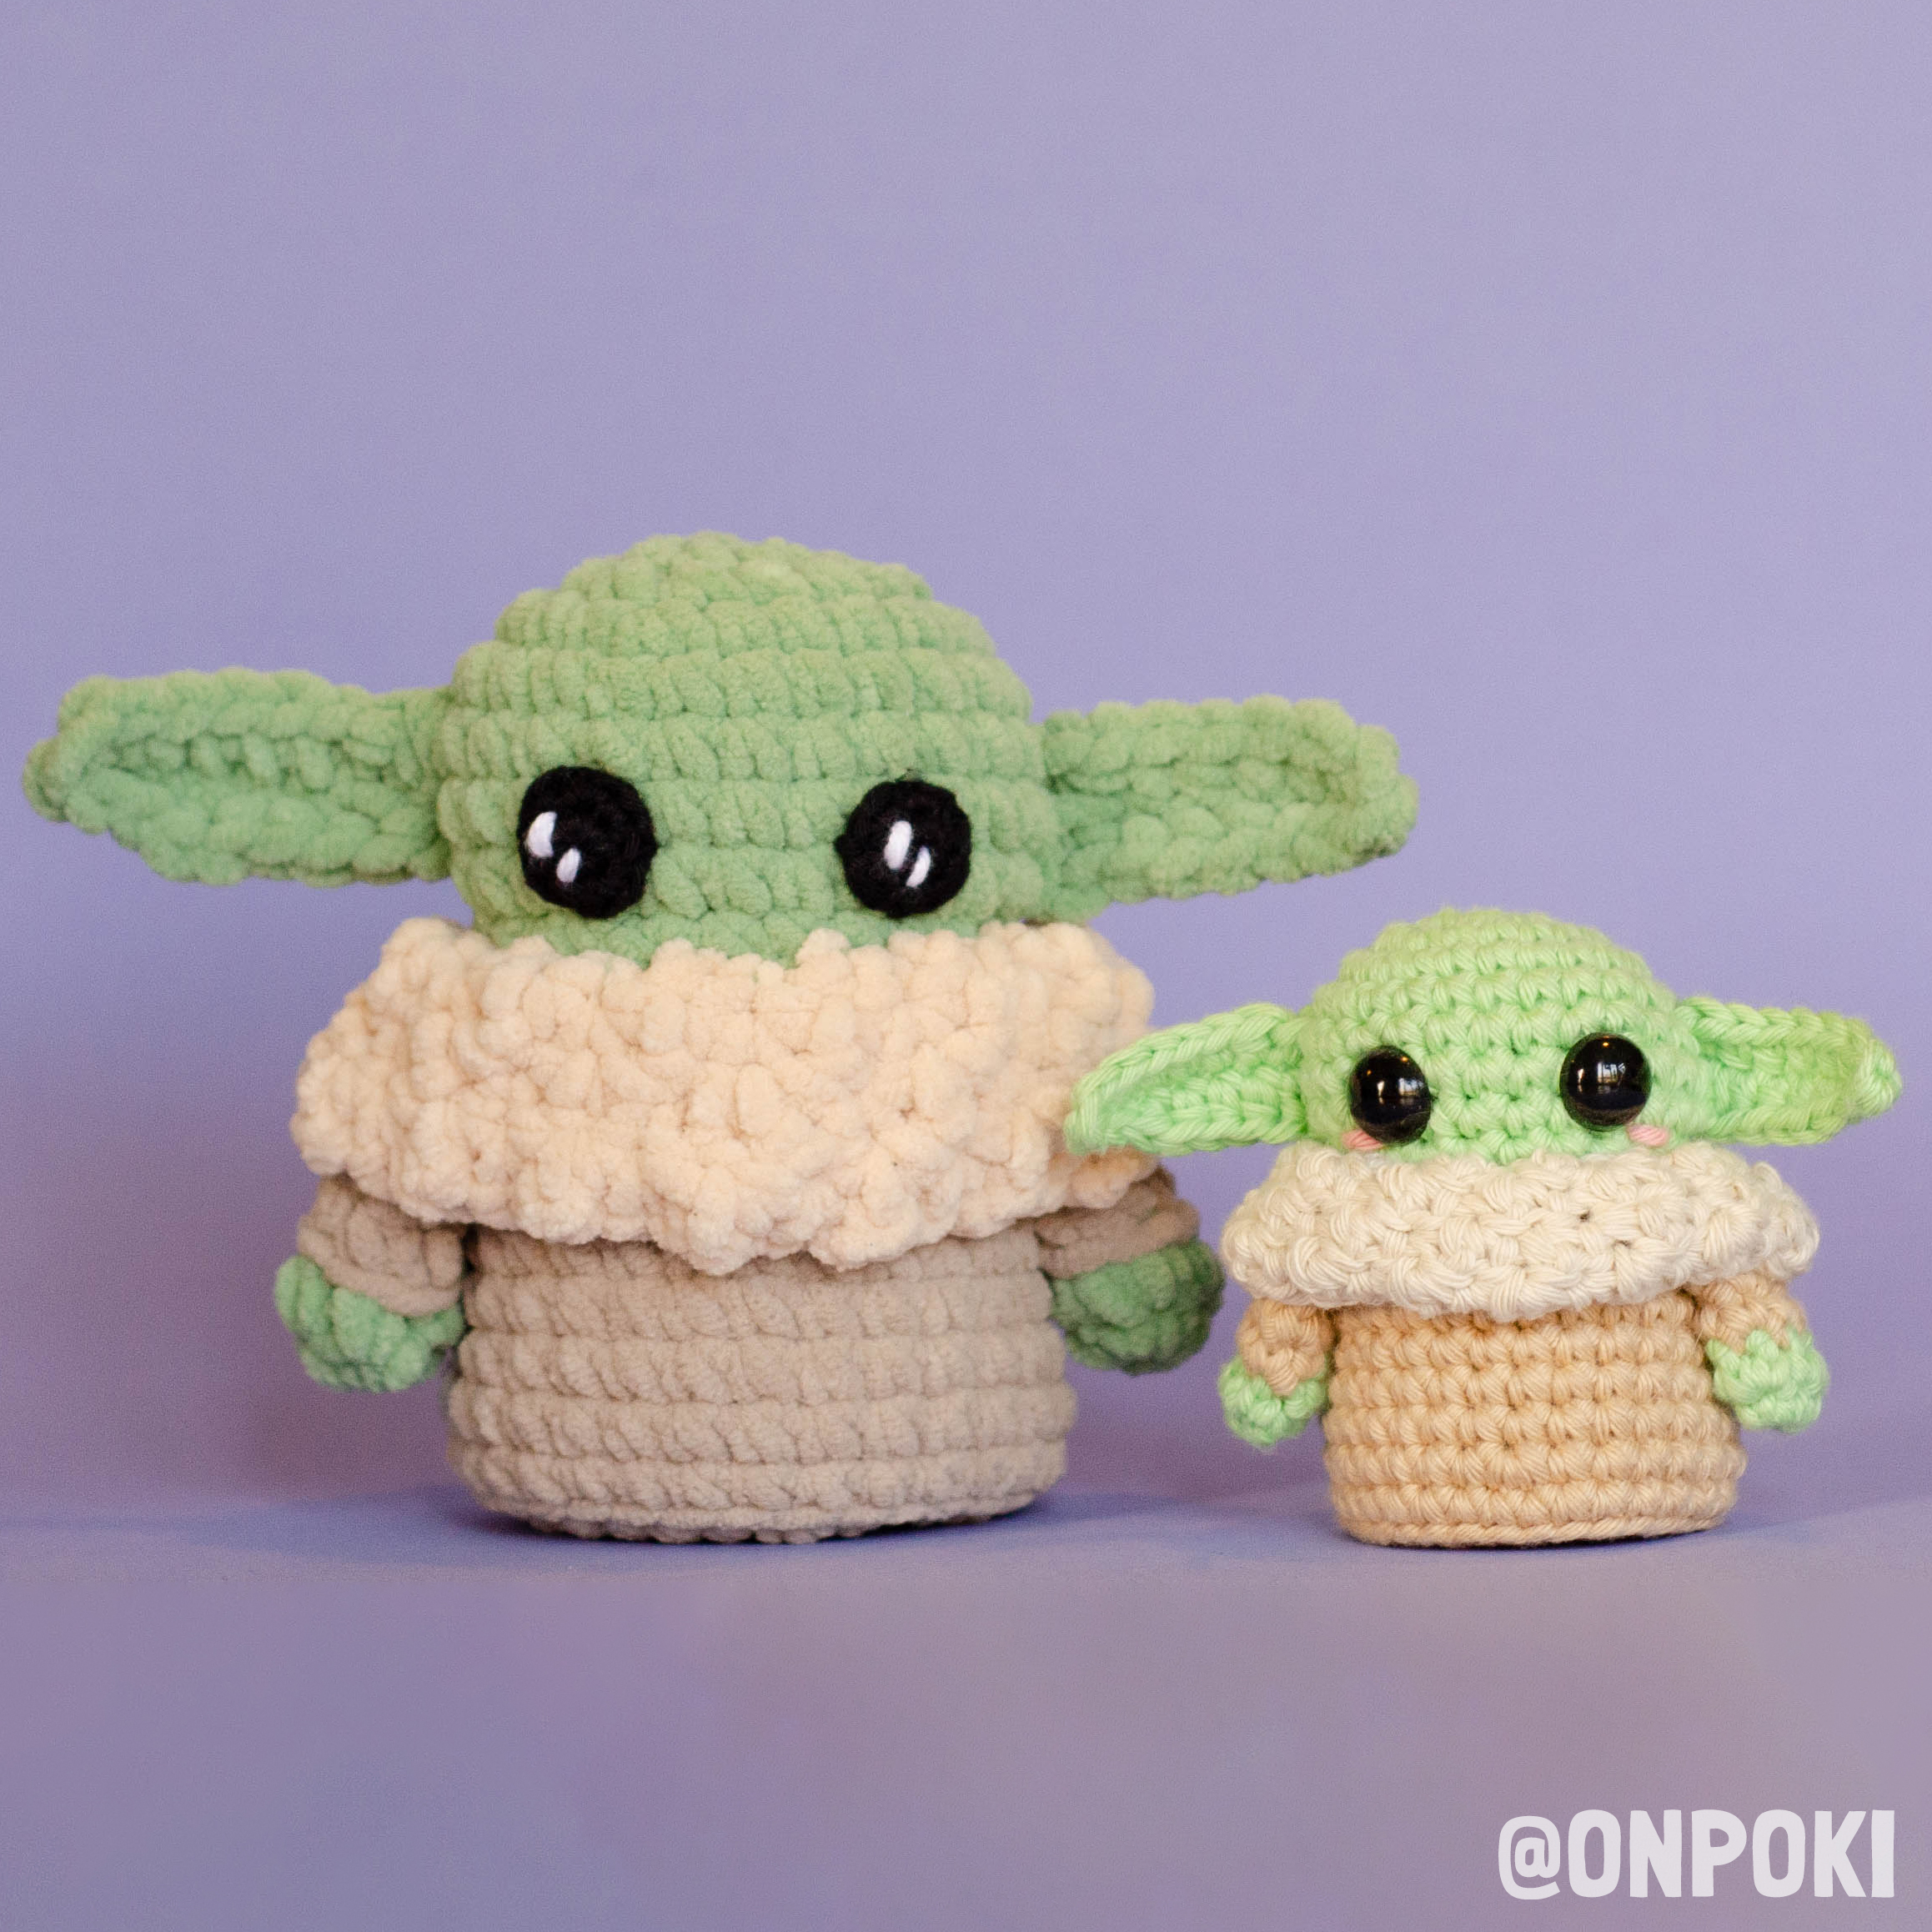
The pattern itself is exactly the same… only the yarn changes 😊
Chenille yarn version – notes
When using chenille yarn, I recommend making the eyes with yarn instead of safety eyes. This gives a softer look and works better with the texture.
The size of the eyes will depend on the thickness of your chenille yarn. For my version, I used black 8 ply yarn (DK weight) and made them like this:
1. Magic ring with 6 sc (6)
2. Inc in each stitch (12)
If you need larger eyes, you can keep increasing:
3. (1 sc, inc) x 6 (18)
4. (2 sc, inc) x 6 (24)

For the highlight, I added a small stitch using white yarn.
To finish the eyes neatly, I recommend closing them using the invisible finish method so they look clean and polished. You can find the tutorial here:
Invisible method to finish an open piece
Prefer a printable version?
If you’d like to support my work… or if you prefer having a nicely formatted PDF with step-by-step photos, you can get it for a symbolic price directly from my website.
Your support helps me keep creating free patterns for the community 💛
Thank you!
You can also support my work with a small tip later in the pattern ☕
:: Free Grogu Pattern ::
Materials & Notes
-
- Yarn: Aran weight cotton yarn in:
- Light green (body): ~12 g
- Light brown (coat): ~15 g
- Light beige (collar): ~18 g
- Pink yarn: less than 1 g (Optional blush)
- Hooks: 3 mm (body and coat), 3.5 mm (collar)
- Extras: 12 mm safety eyes, stuffing (~5 g), tapestry needle, stitch markers, row counter
- Yarn: Aran weight cotton yarn in:
You can also make this pattern using chenille yarn for a softer, fluffier result ☁️
Here’s how it looks compared to the original cotton version:
The pattern itself is exactly the same… only the yarn changes 😊
Chenille yarn version – notes
When using chenille yarn, I recommend making the eyes with yarn instead of safety eyes. This gives a softer look and works better with the texture.
The size of the eyes will depend on the thickness of your chenille yarn. For my version, I used black 8 ply yarn (DK weight) and made them like this:
1. Magic ring with 6 sc (6)
2. Inc in each stitch (12)
If you need larger eyes, you can keep increasing:
3. (1 sc, inc) x 6 (18)
4. (2 sc, inc) x 6 (24)
To finish the eyes neatly, I recommend closing them using the invisible finish method so they look clean and polished. You can find the tutorial here:
Invisible method to finish an open piece
For the eye detail, I added three small stitches using a yarn needle and white yarn.
* This pattern uses US crochet terms *
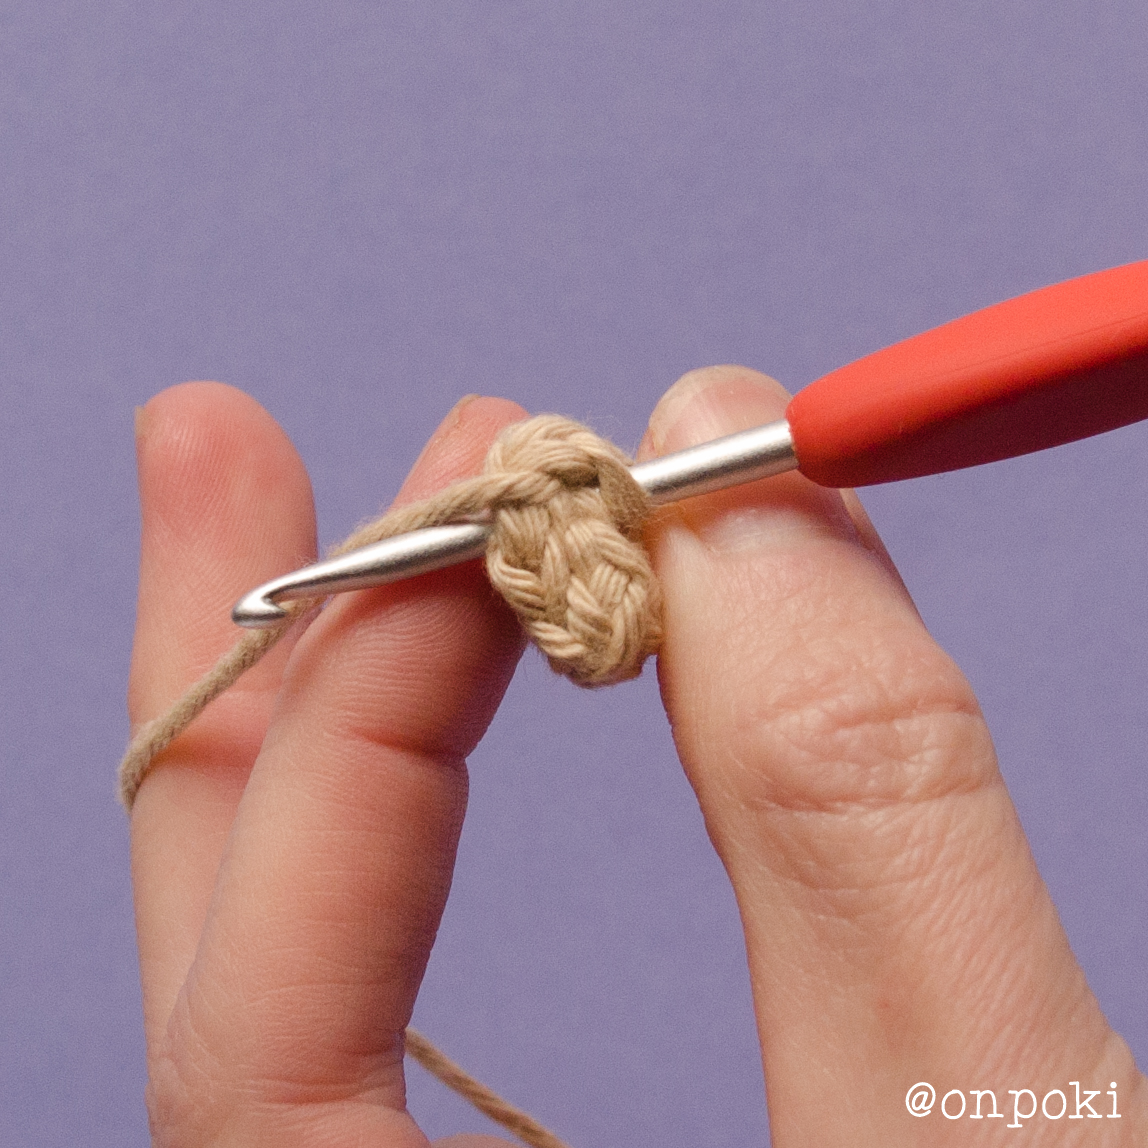
:: Let’s begin ::
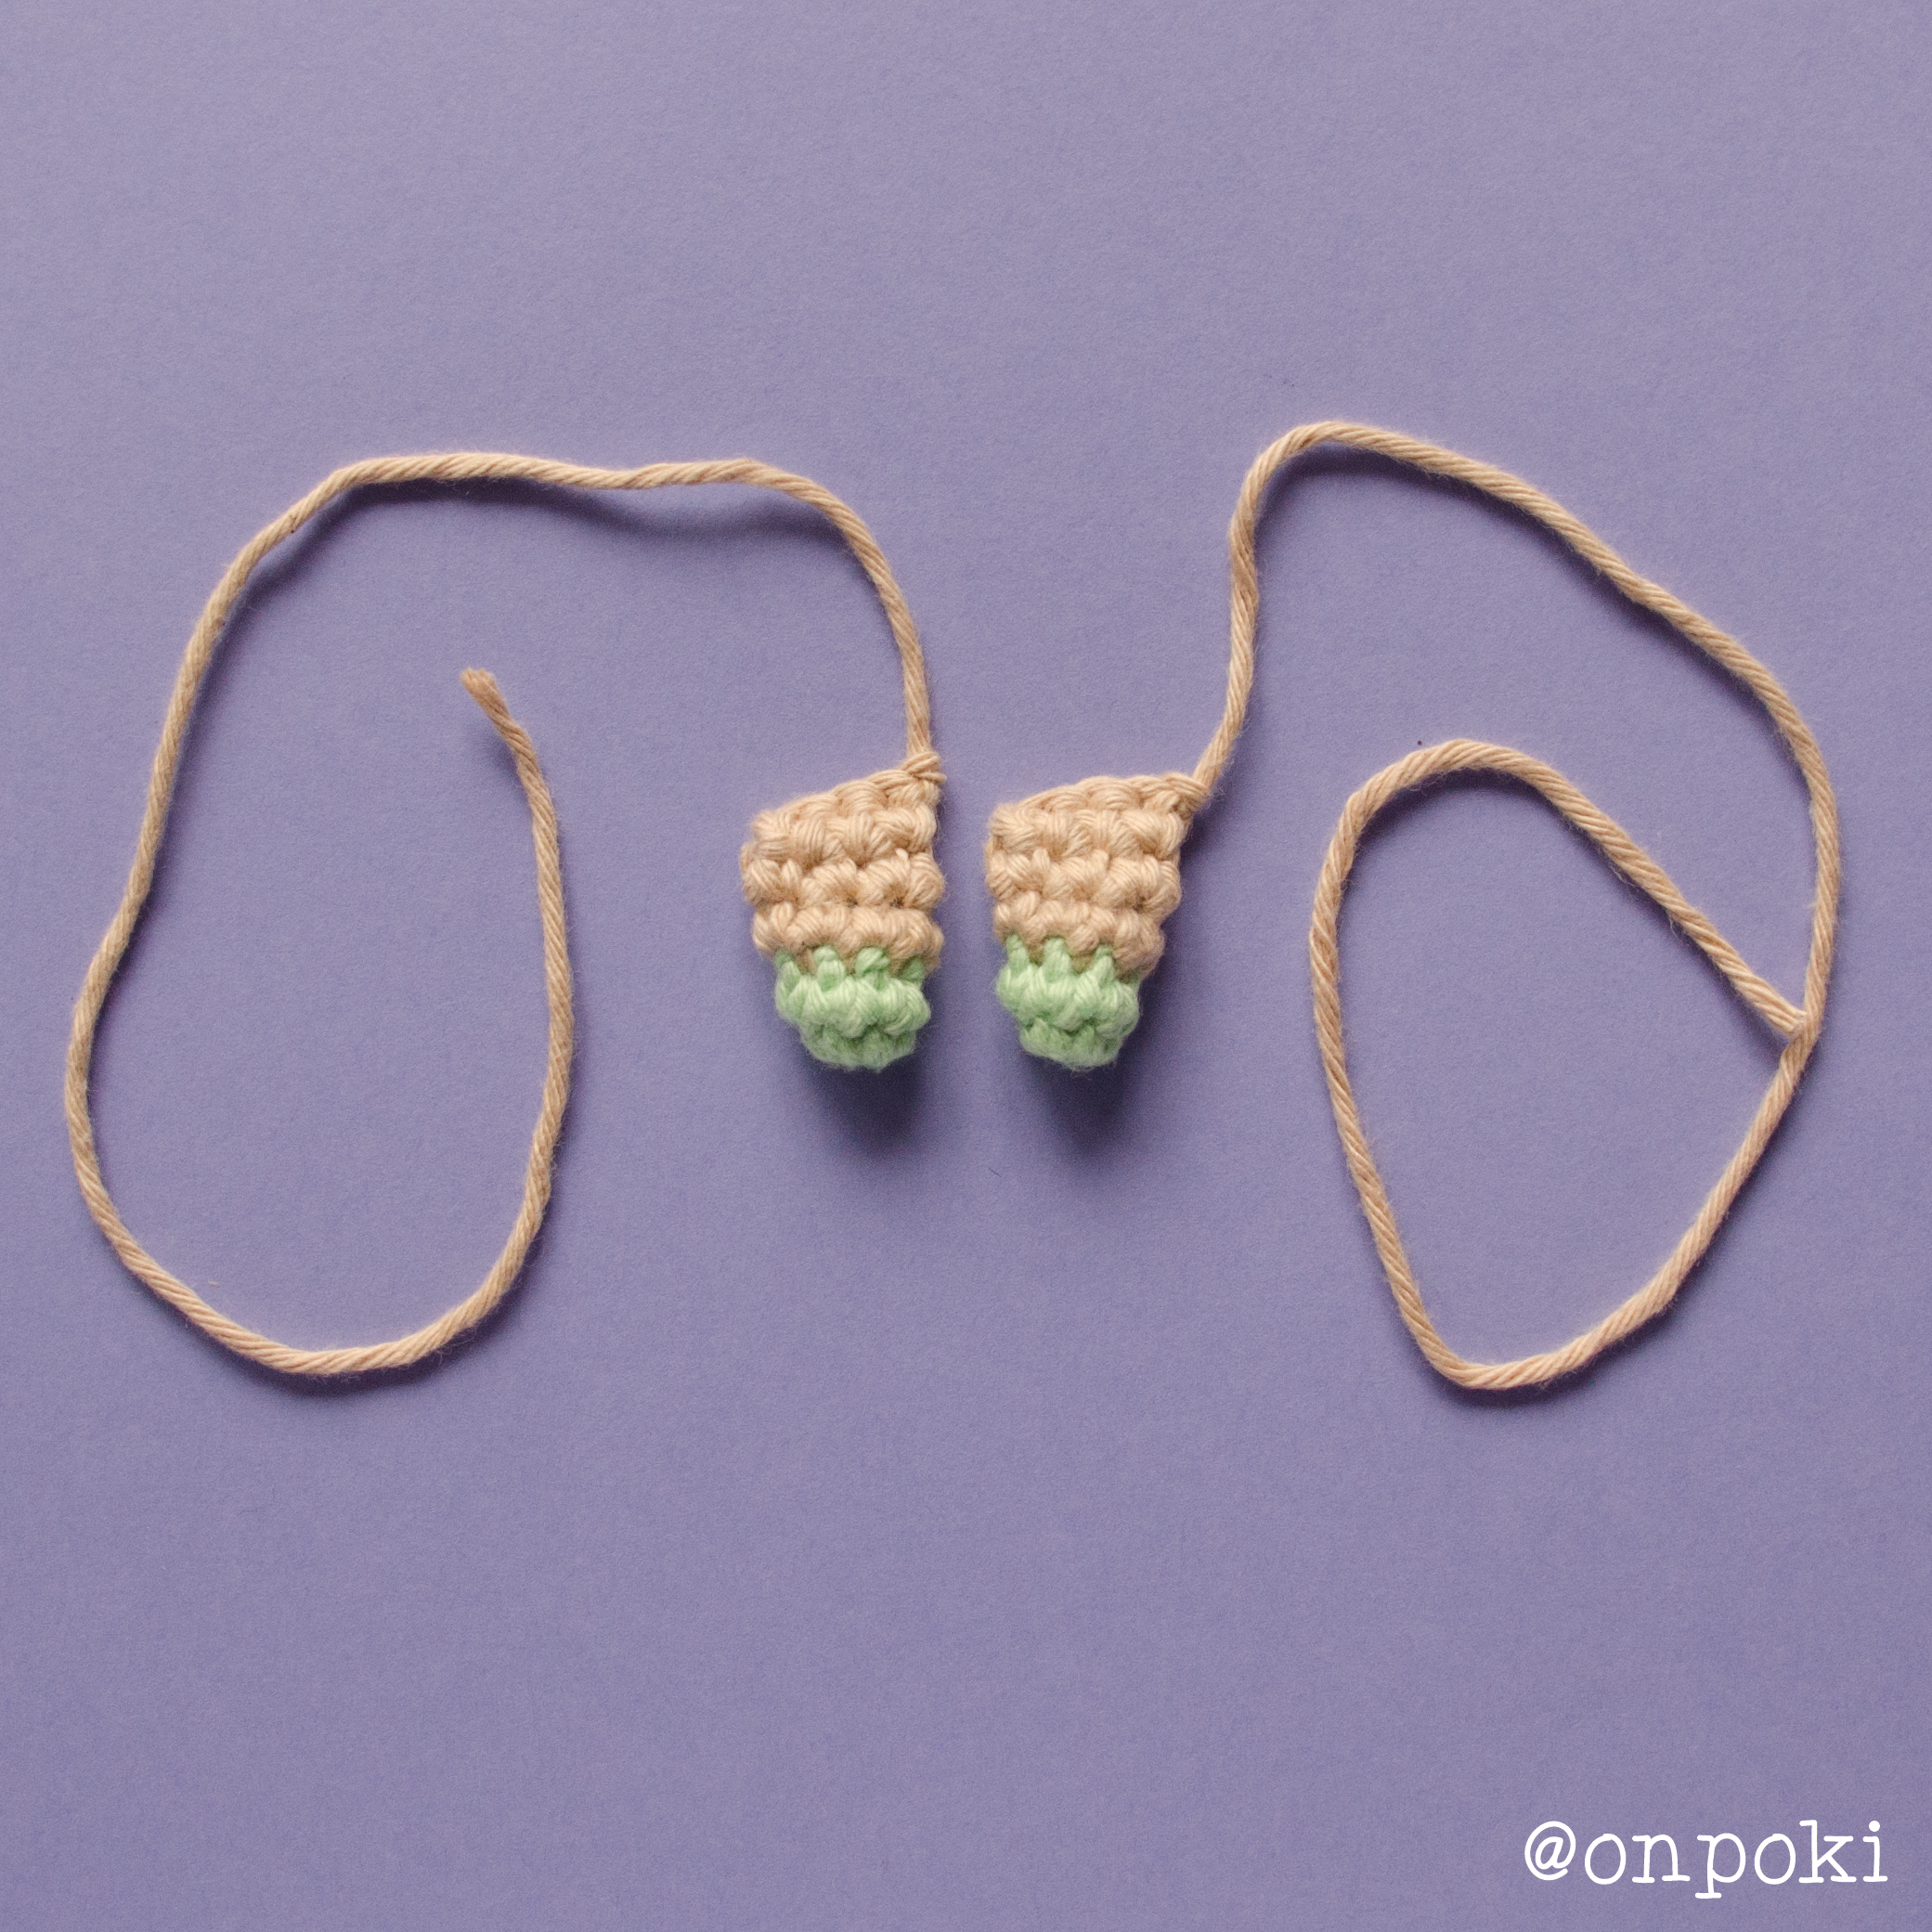
:: Arms (make 2) ::
Folding Grogu’s arm to close with stitches
Grogu’s finished arms, ready to attach
* Use green yarn *
1) MR 6 (6)
2) 3 sc, 1 inc, 2 sc (7)
Switch to coat colour
* Don’t make the slip stitches too tight on the next round or round 4 will be a nightmare. You’ve been warned *
3) 7 sl st (7)
4) 7 sc (7)
Cut and secure the green yarn.
Don’t stuff. Fold the arm flat and crochet 3 sc across to close.
Leave a long tail for sewing.
:: Ears (make 1 right and 1 left) ::
The ears are made with mirrored instructions so they look symmetrical when attached. If you make them the same, one will have the wrong side showing in front.
Use green yarn
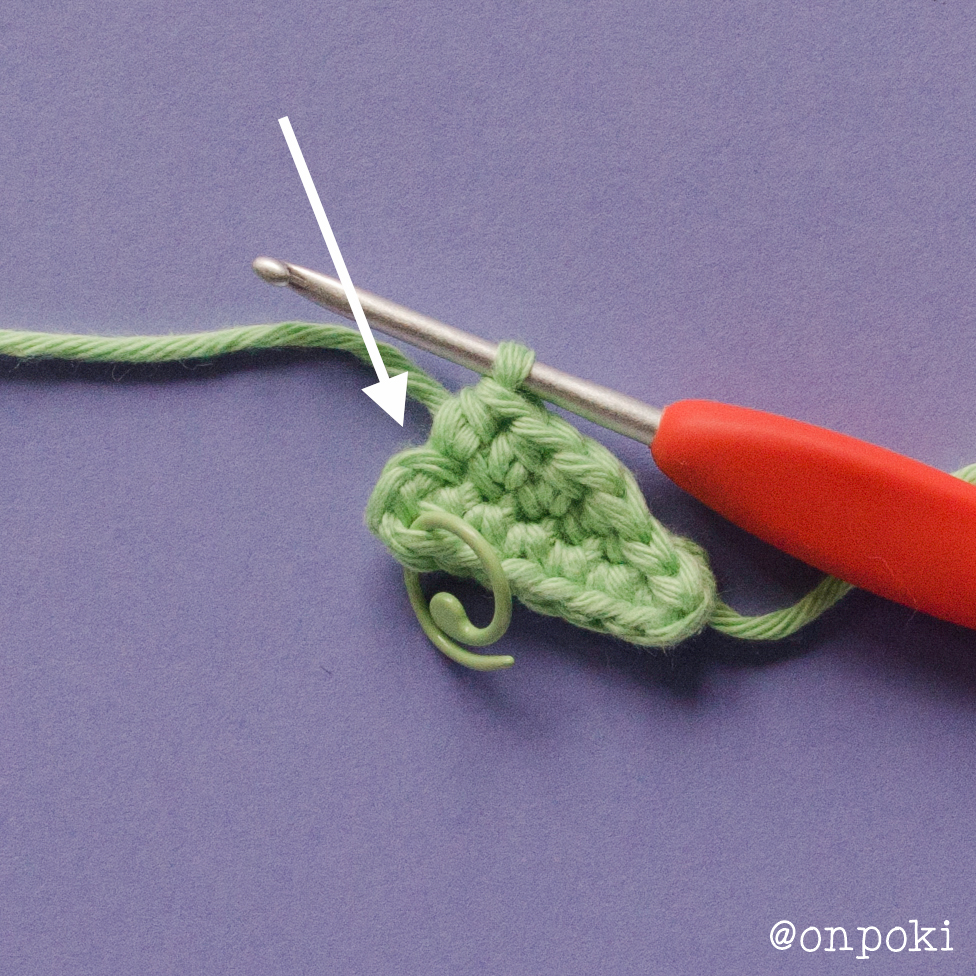
Crochet step showing where to insert the hook for Grogu’s left ear
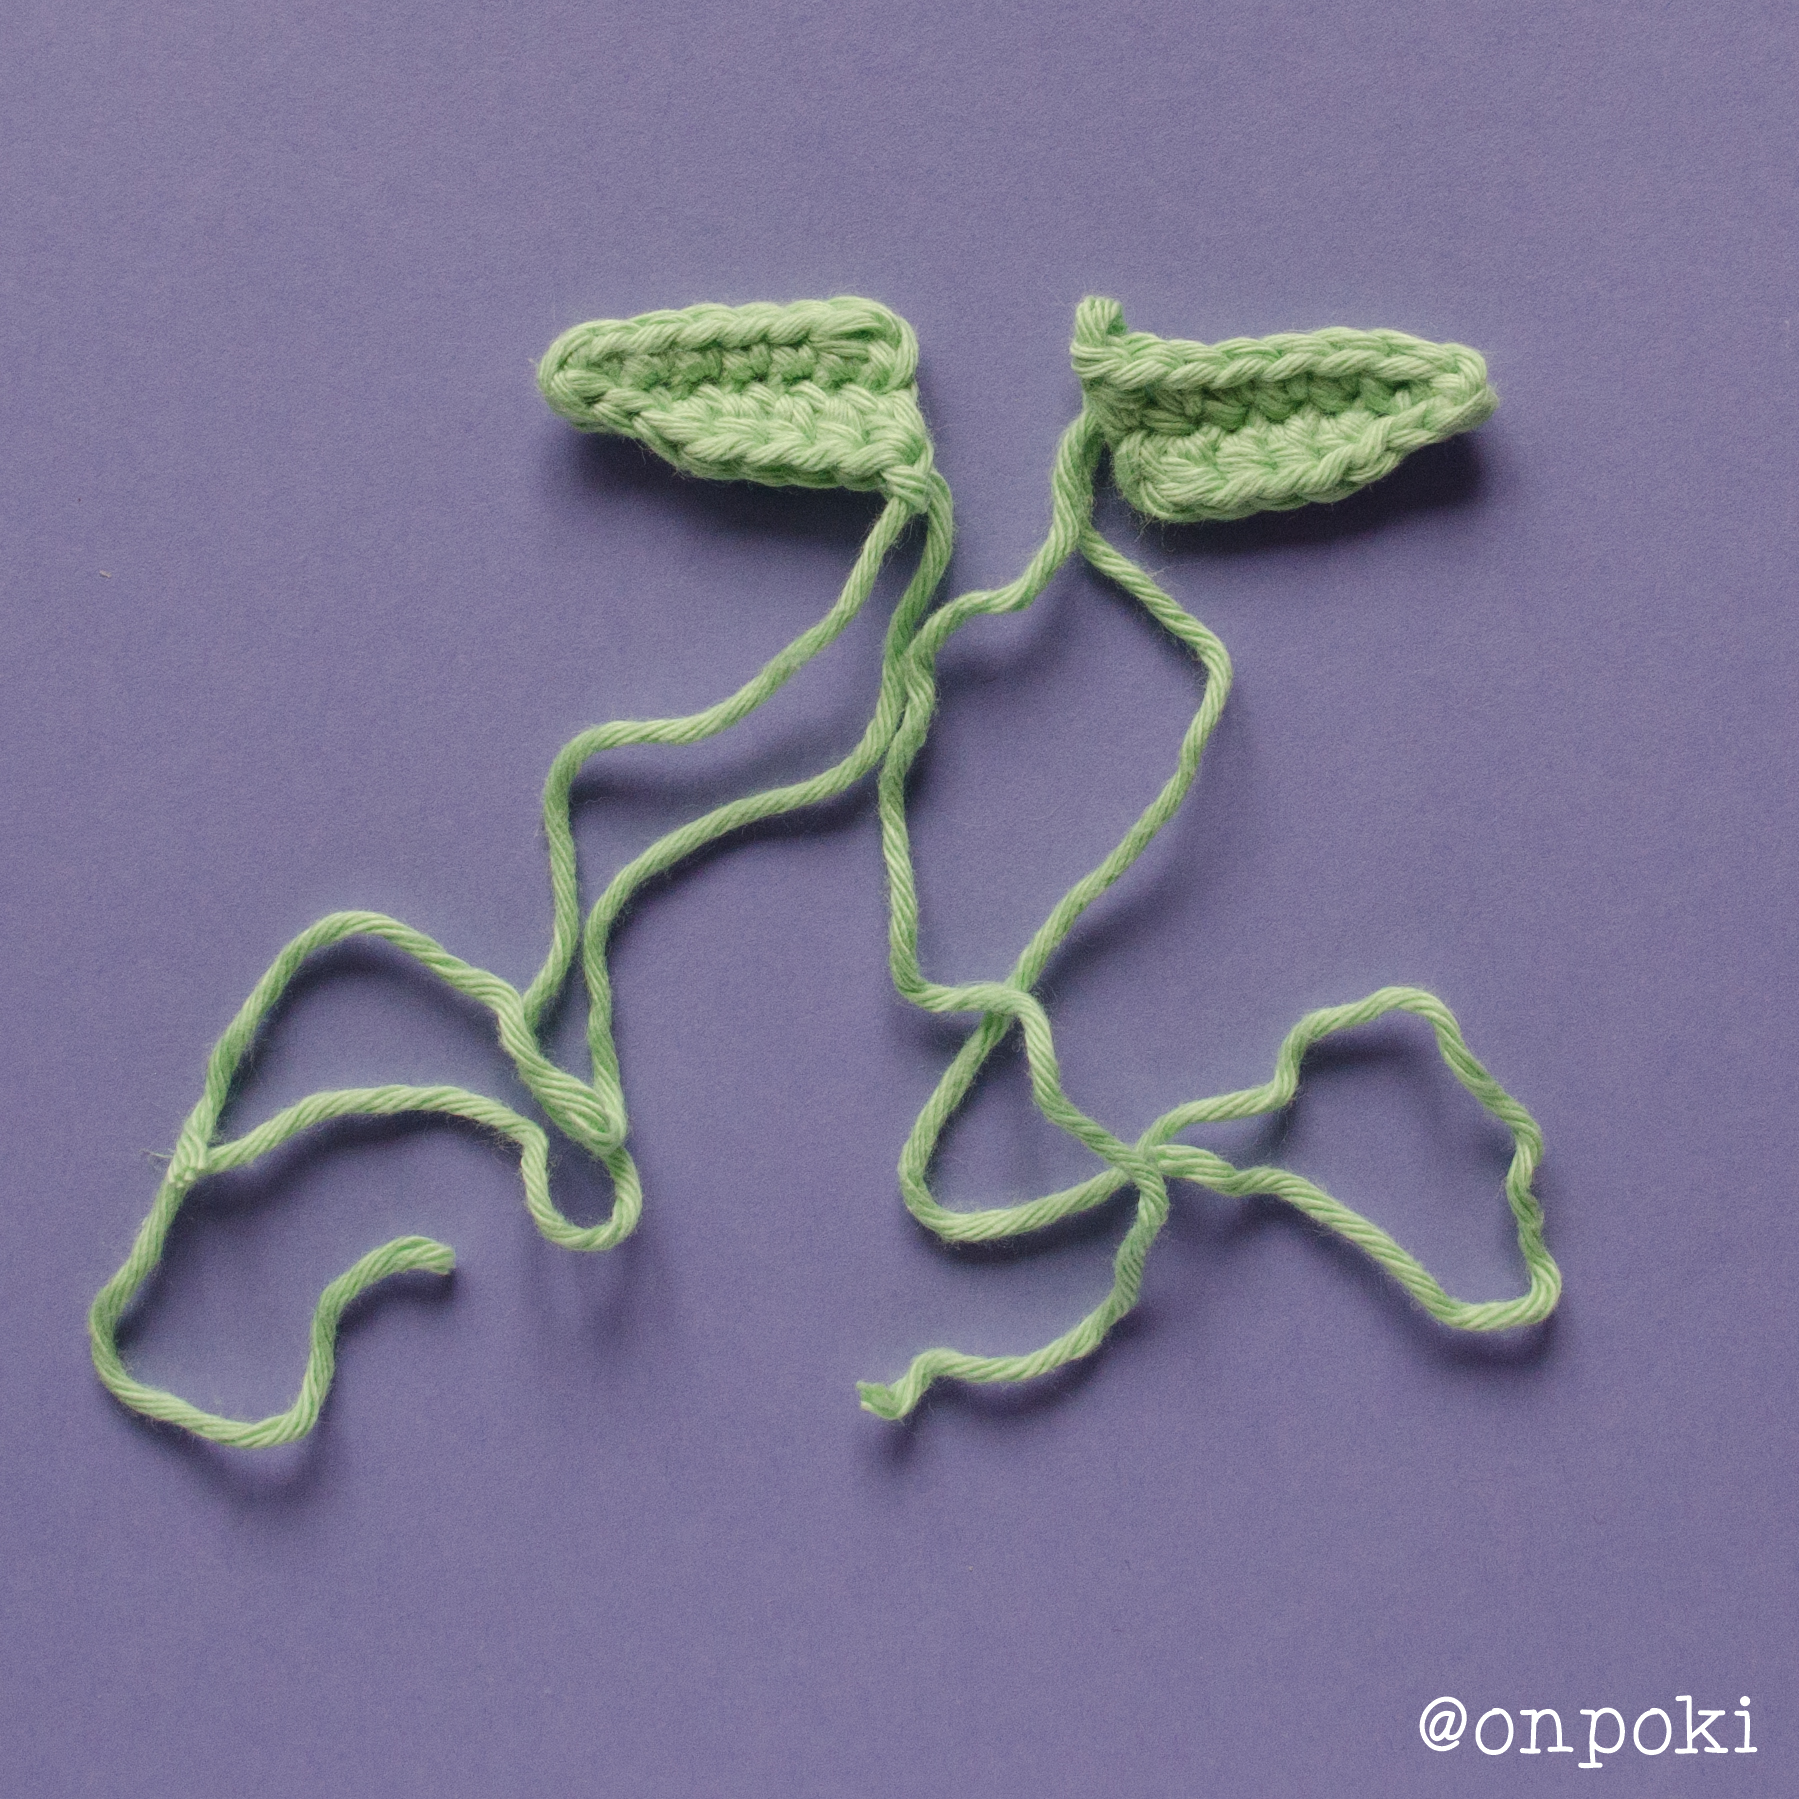
Finished ears for Grogu in green yarn
Left ear
Ch 8
Starting in 3rd ch from hook: 1 hdc, 4 sc
In last ch: <2 sc, 1 sl st>
Other side: 1 sl st, 5 hdc {Make the last hdc in the stitch marked with a white arrow shown in the first picture}
Fasten off
Right ear
Ch 8
Starting in 3rd ch from hook: 4 hdc, 1 sl st
In last ch: <1 sl st, 2 sc>
Other side: 4 sc, 1 hdc
Fasten off
Both ears: Weave the tail to the base. Ready to attach later.
:: Head and Body ::
* Use green yarn *
1) MR 6 (6)
2) 1 inc, <3 sc>, 1 inc in each of the next 2 sts, <3 sc>, 1 inc (14)
3) 2 sc, 1 inc in each of the next 3 sts, 4 sc, 1 inc in each of the next 3 sts, 2 sc (20)
4) 3 sc, 1 inc, 2 sc, 1 inc, 6 sc, 1 inc, 2 sc, 1 inc, 3 sc (24)
5–8) 24 sc (24)
9) 3 sc, 1 dec, 2 sc, 1 dec, 6 sc, 1 dec, 2 sc, 1 dec, 3 sc (20)
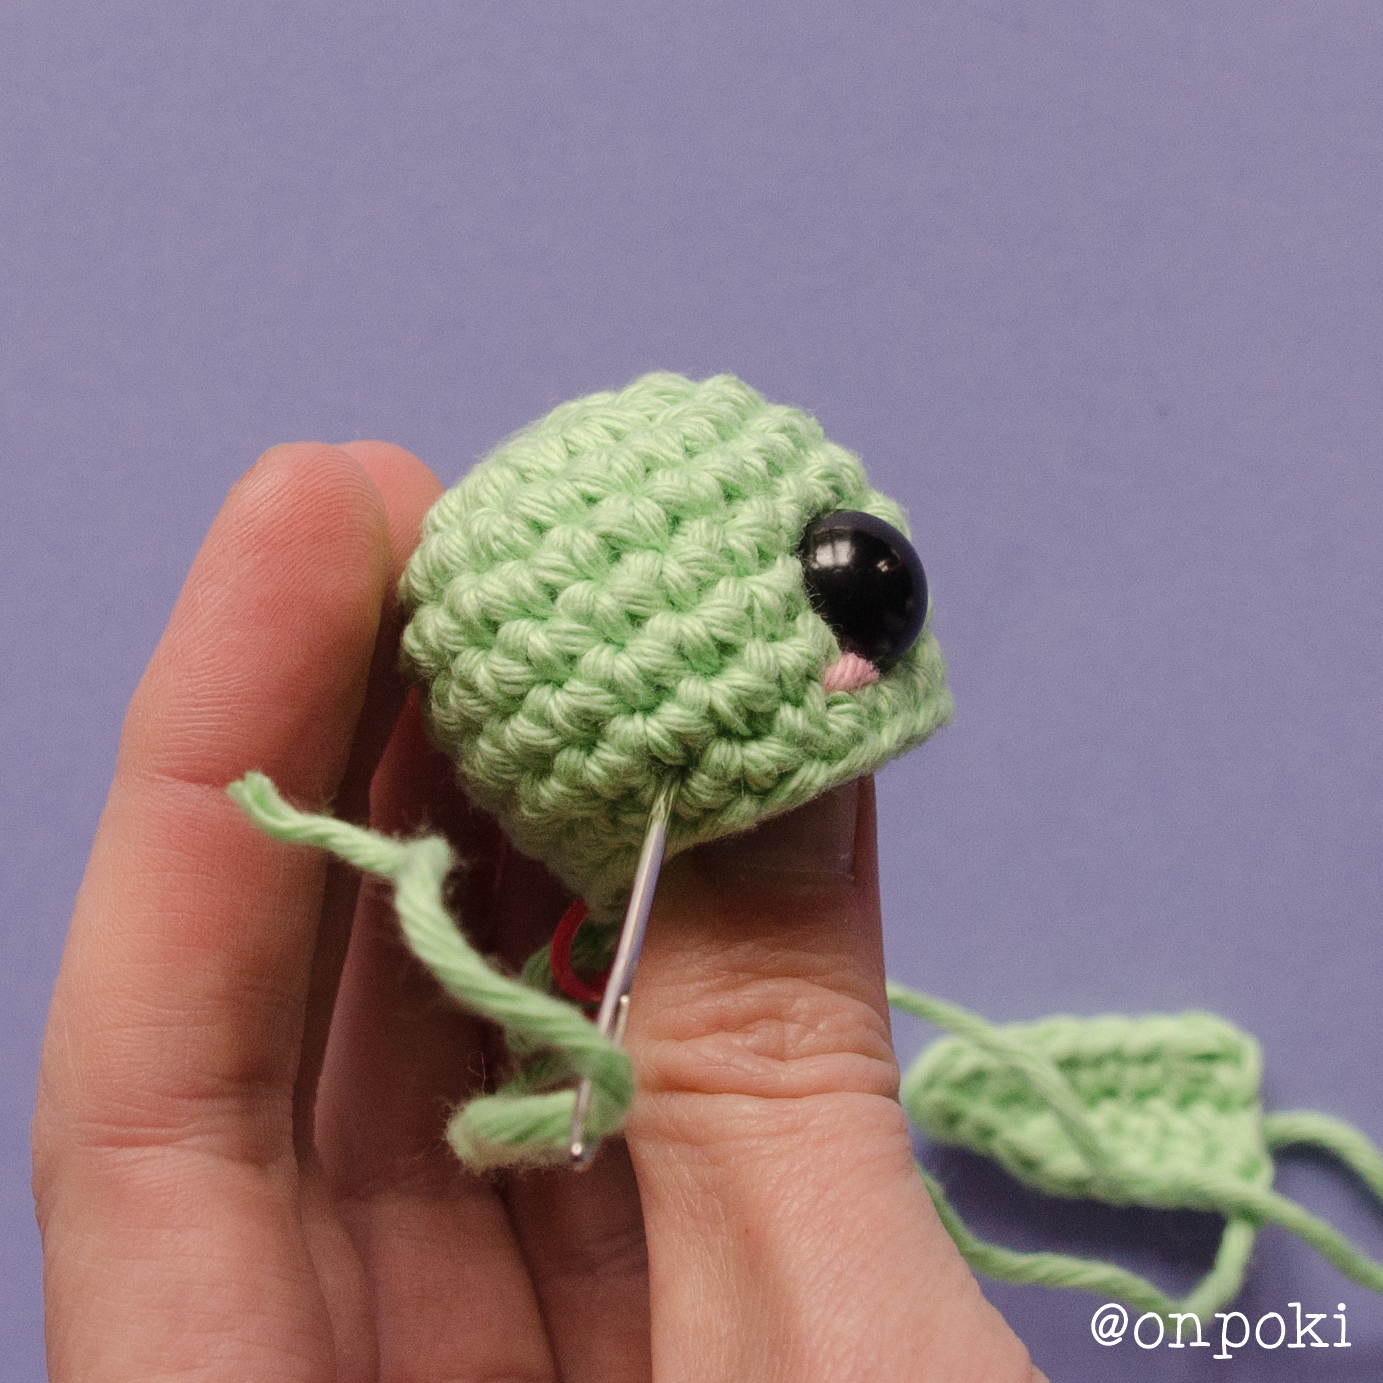
Face details:
Insert safety eyes between rounds 7 and 8, 4 stitches apart.
Sew ears between rounds 5 and 9, over the rounds 6, 7 and 8, 4 stitches from the eyes.
If you want to give your Grogu some extra cuteness, you can add a little blush just below and to the side of each eye. I made two small pink lines, one stitch wide each, between rounds 8 nad 9, placed one stitch to the side and slightly below the eyes.
Si estás haciendo la versión con hilo chenille, te recomiendo hacer los ojos con hilo en lugar de usar ojos de seguridad para un acabado más suave. Ver las notas de la versión chenille arriba para las instrucciones.

Safety eyes and blush placement on Grogu’s face before sewing
Where to position Grogu’s ears before attaching
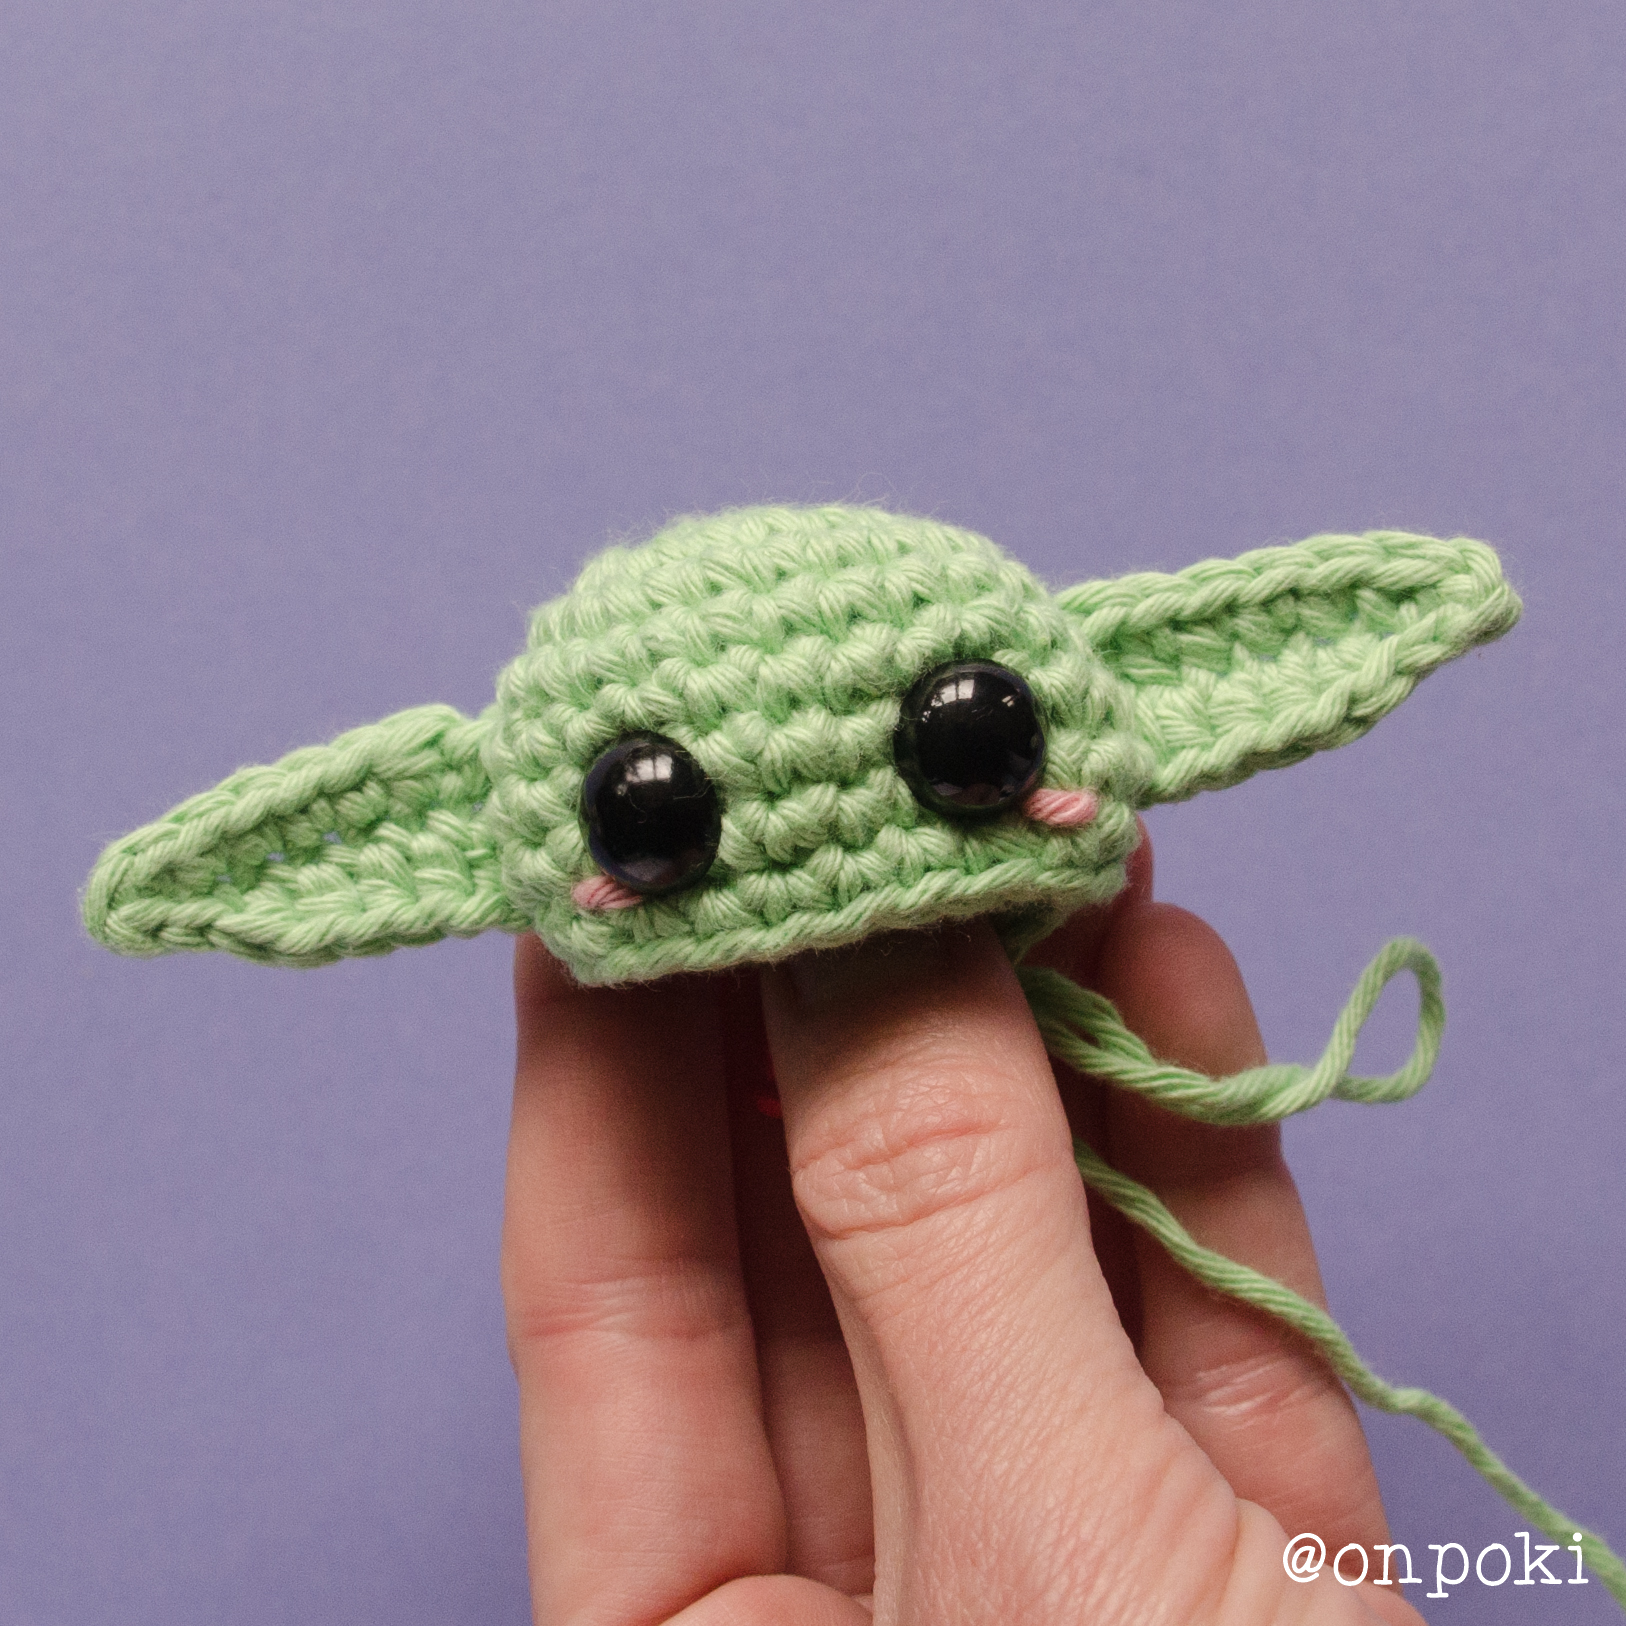
Finished Grogu head with ears attached and blush details
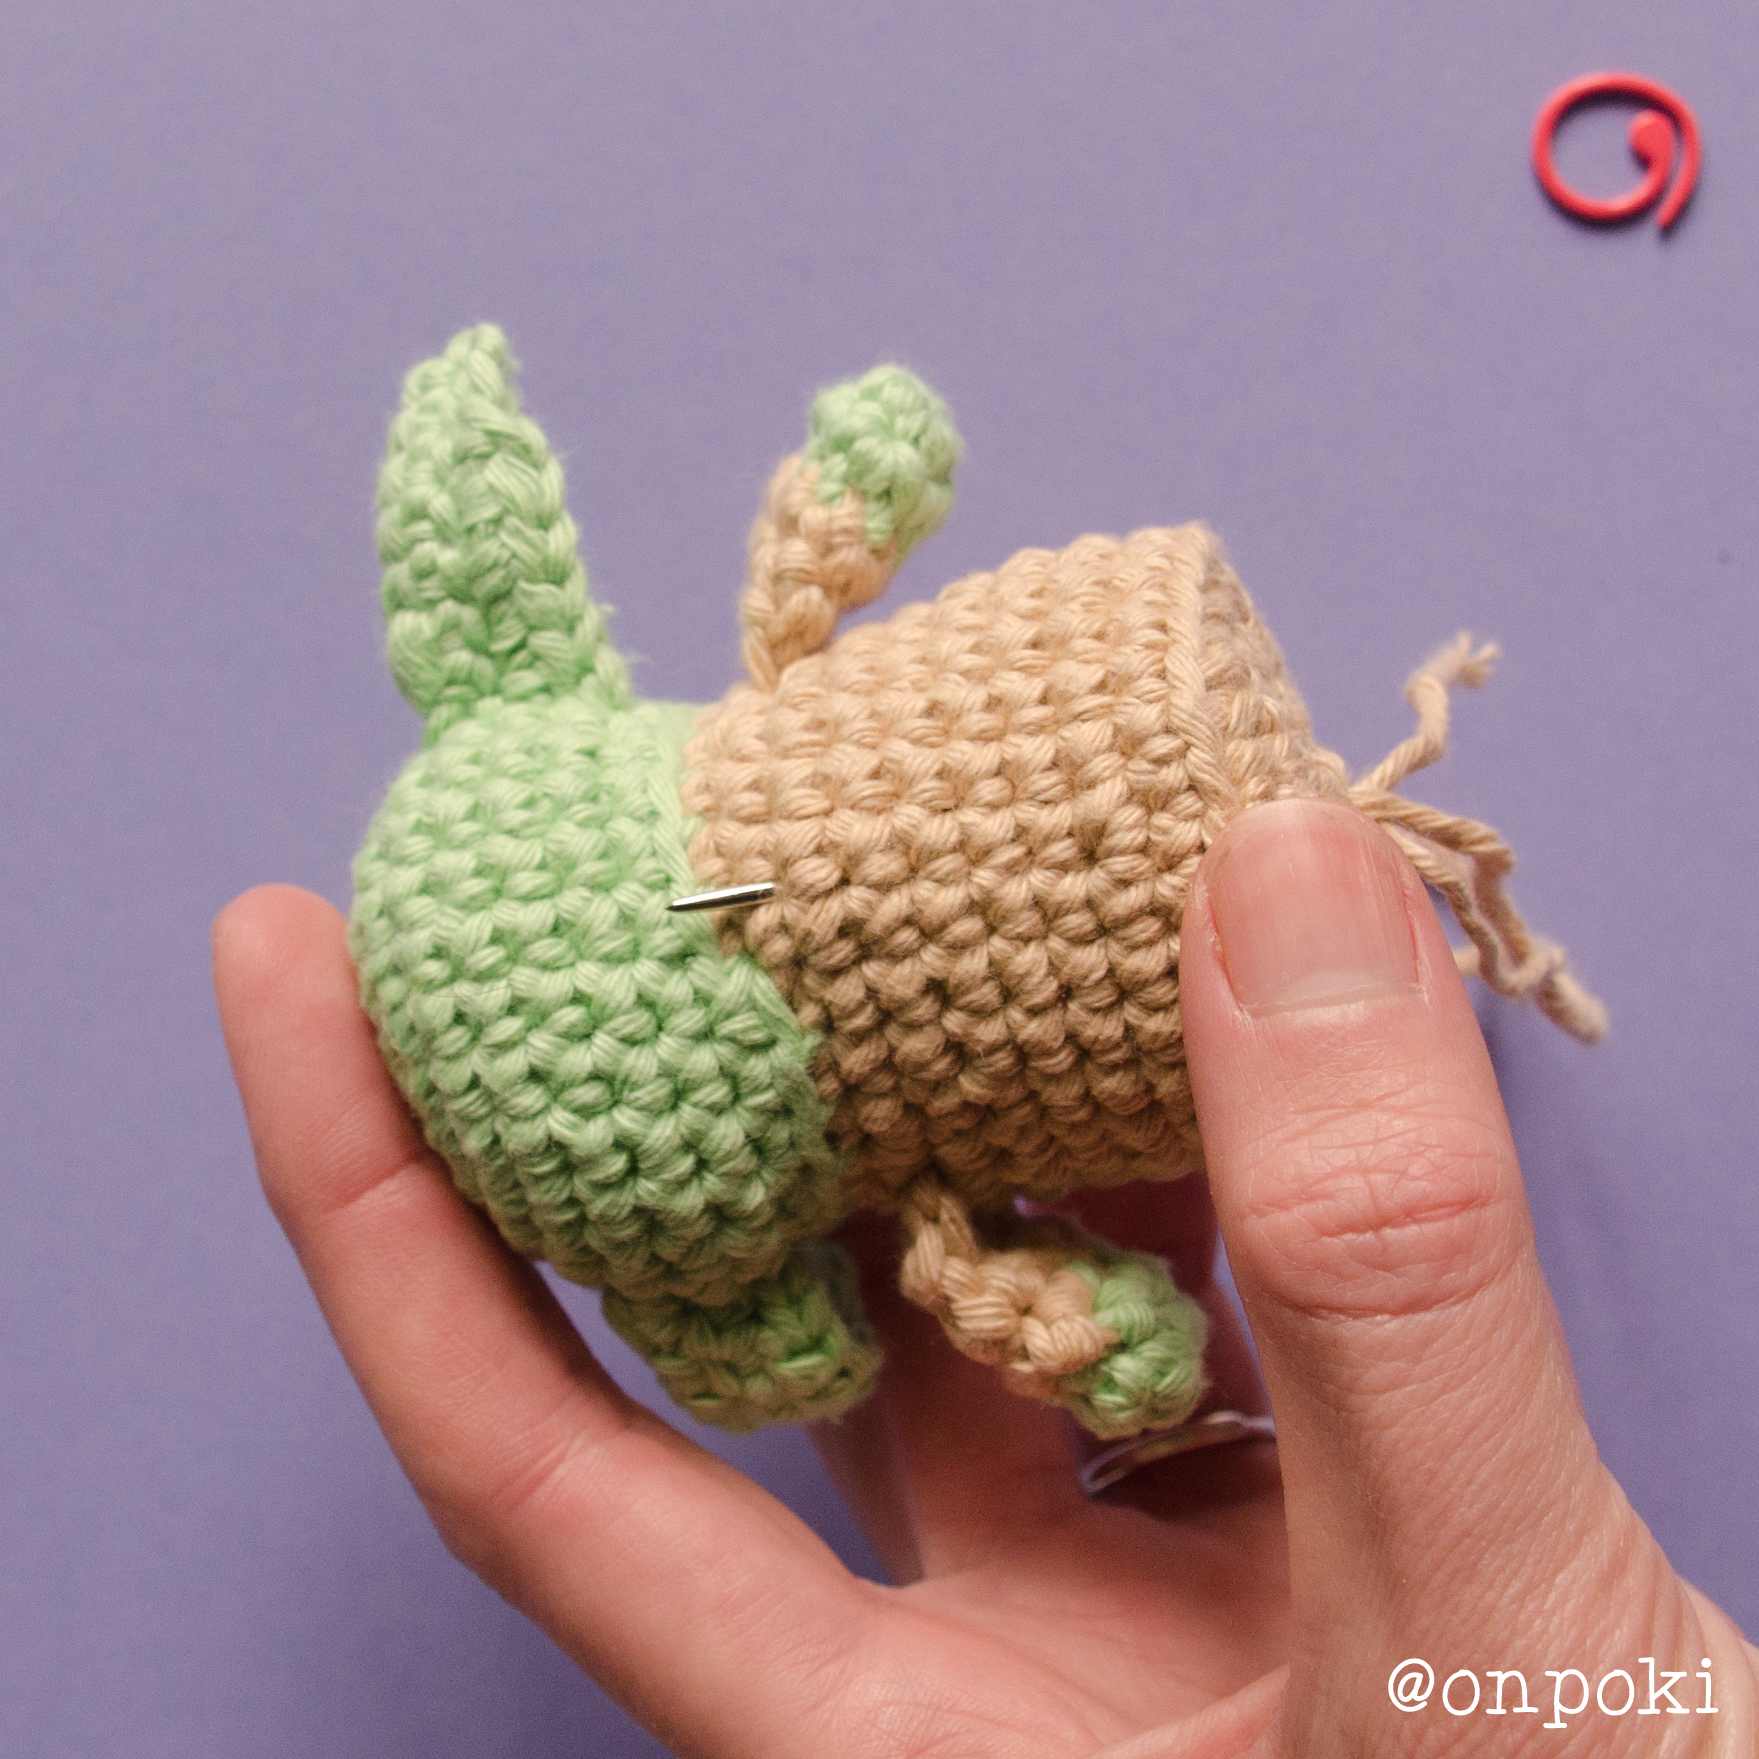
Switch to coat colour
10) 20 sc in back loop only (20)
11) 3 sc, 1 inc, 2 sc, 1 inc, 7 sc, 1 inc, 2 sc, 1 inc, 2 sc (24)
12) 24 sc (24)
Fasten off green yarn and stuff head firmly.
13) 6 sc, 1 inc, 11 sc, 1 inc, 5 sc (26)
Attach arms between rounds 11–12, leaving 8 sts between them.
14) 26 sc (26)
15) 7 sc, 1 inc, 13 sc, 1 inc, 4 sc (28)
16) 28 sc (28)
17) 1 sc, 1 inc, 13 sc, 1 inc, 12 sc (30)
18) 30 sc (30)
19) (3 sc, 1 dec) x6 — in back loops only (24)
20) (2 sc, 1 dec) x6 (18)
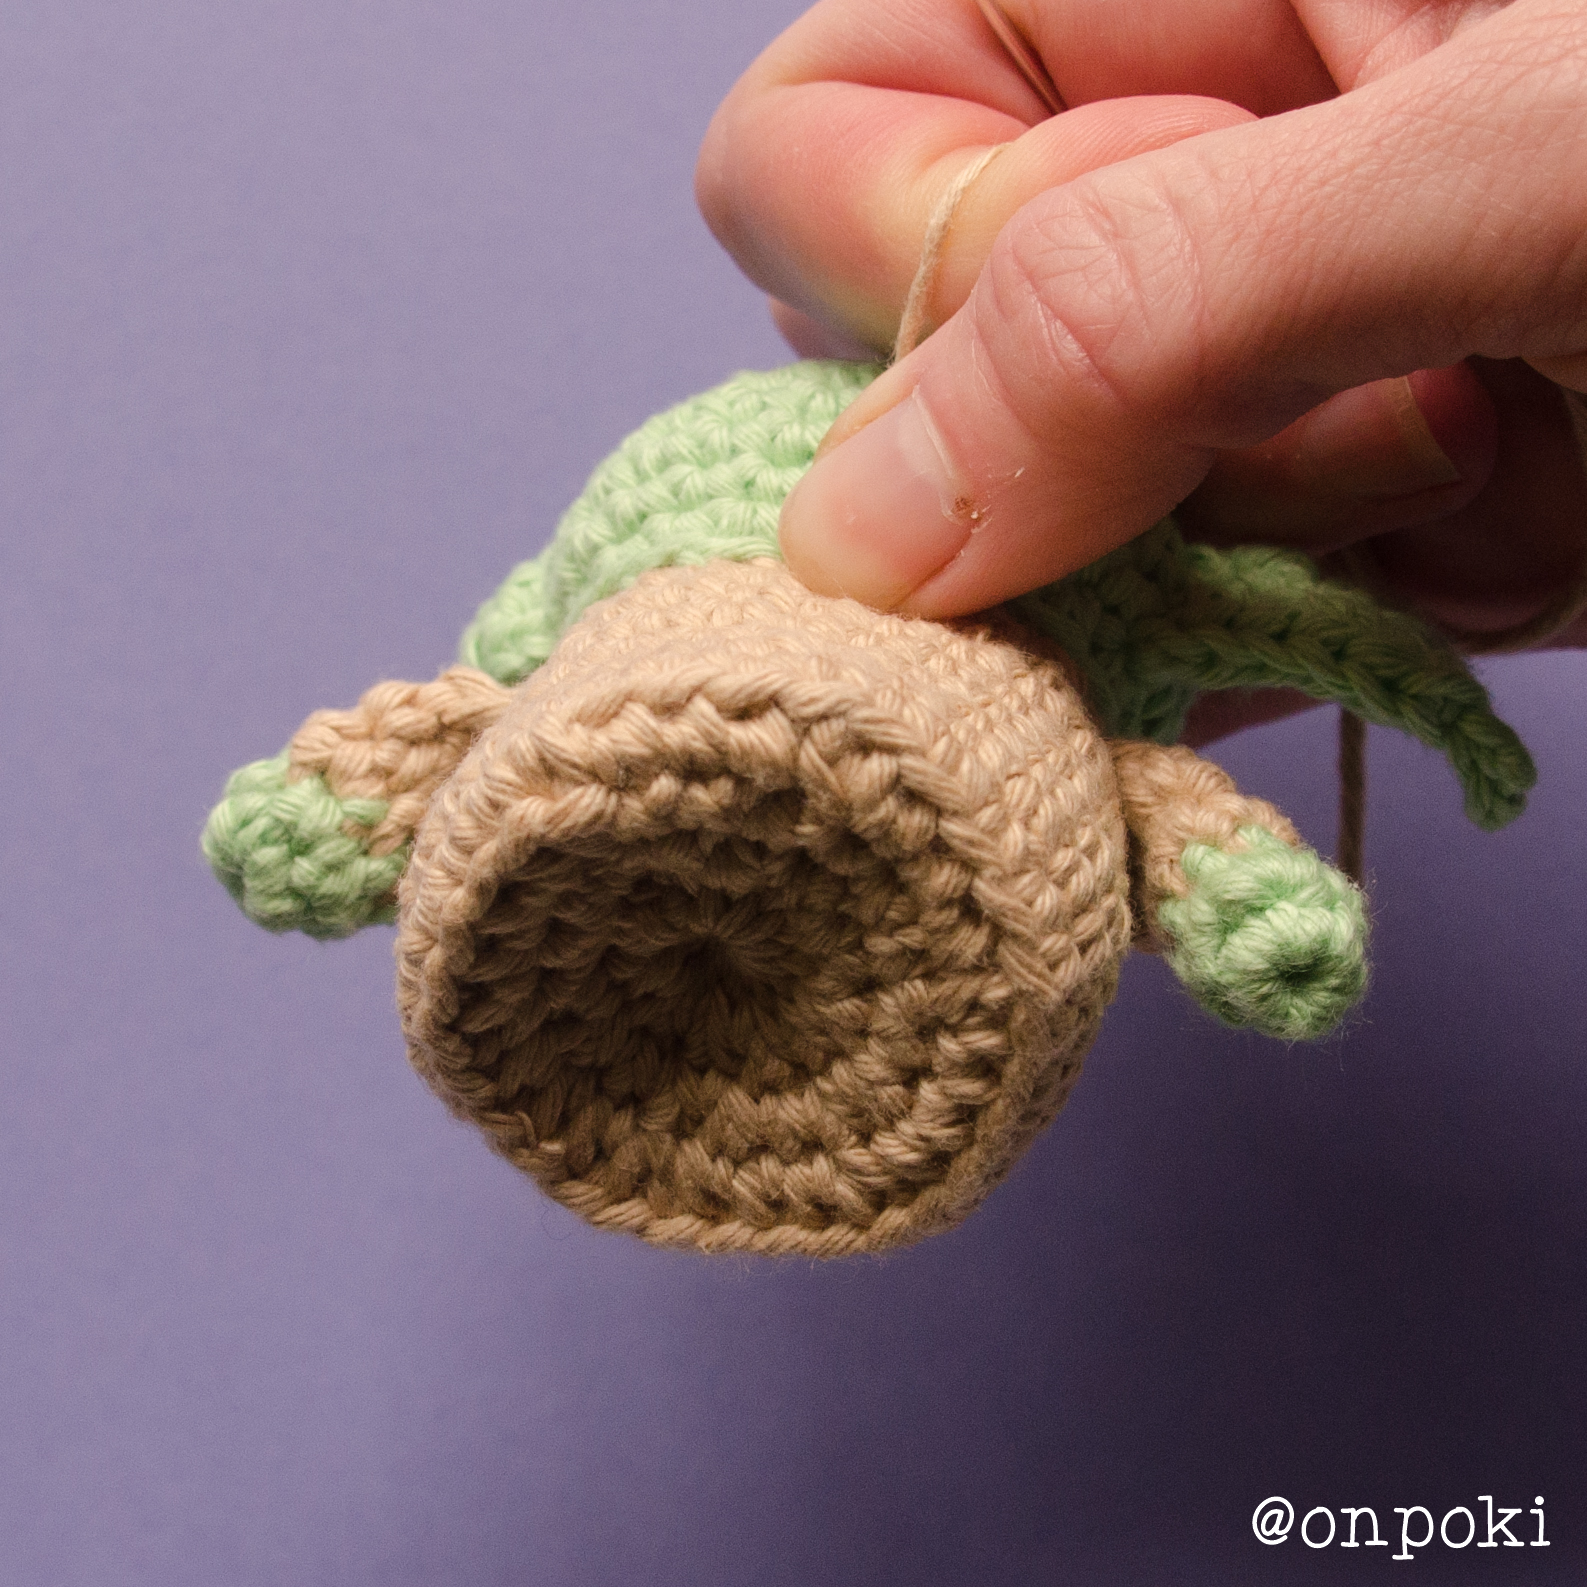
Stuff the body well, but don’t overstuff it or the base will start to push outward instead of staying flat. Don’t worry, we’ll secure it later so it keeps the right shape.
21) (1 sc, 1 dec) x6 (12)
Closing the base
Cut the yarn, leaving a long tail (around 25 cm), and thread it into a tapestry needle. Pass the needle through the front loop of each stitch of the last round, one by one. Gently but firmly pull the yarn to close the circle.
Insert the needle through the centre of the closure and bring it out at the back, near Grogu’s neck. Pull slightly to shape the base inward so he can stand up straight.
Make two firm knots at the back to hold that shape in place. Then hide the tail inside the body, pulling a bit more so the knots get tucked in too.
Don’t worry—this part will be completely covered by the coat’s collar.
Needle coming out through Grogu’s back to lock the shape
Pulling the yarn to shape Grogu’s base into a concave bottom
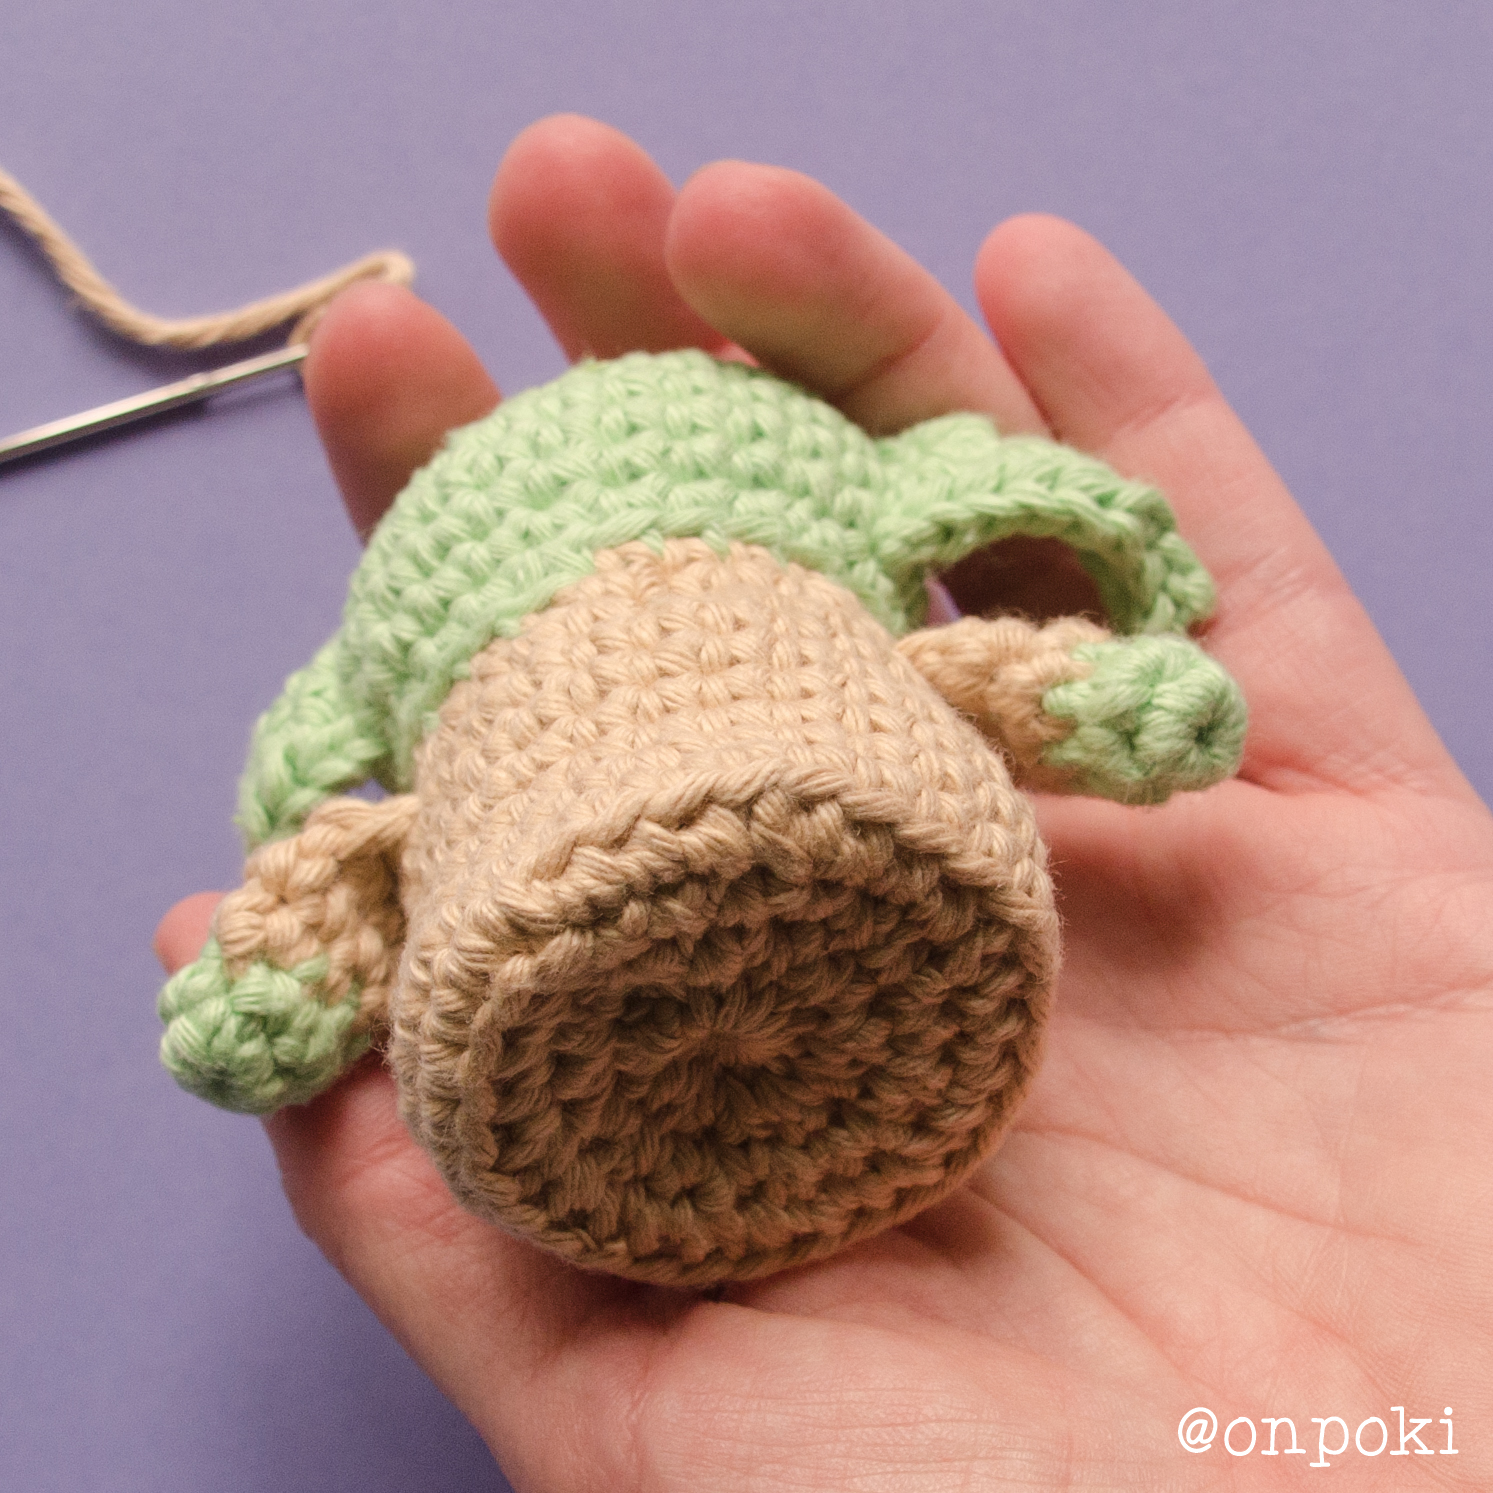
Grogu’s base secured with yarn to keep the concave shape
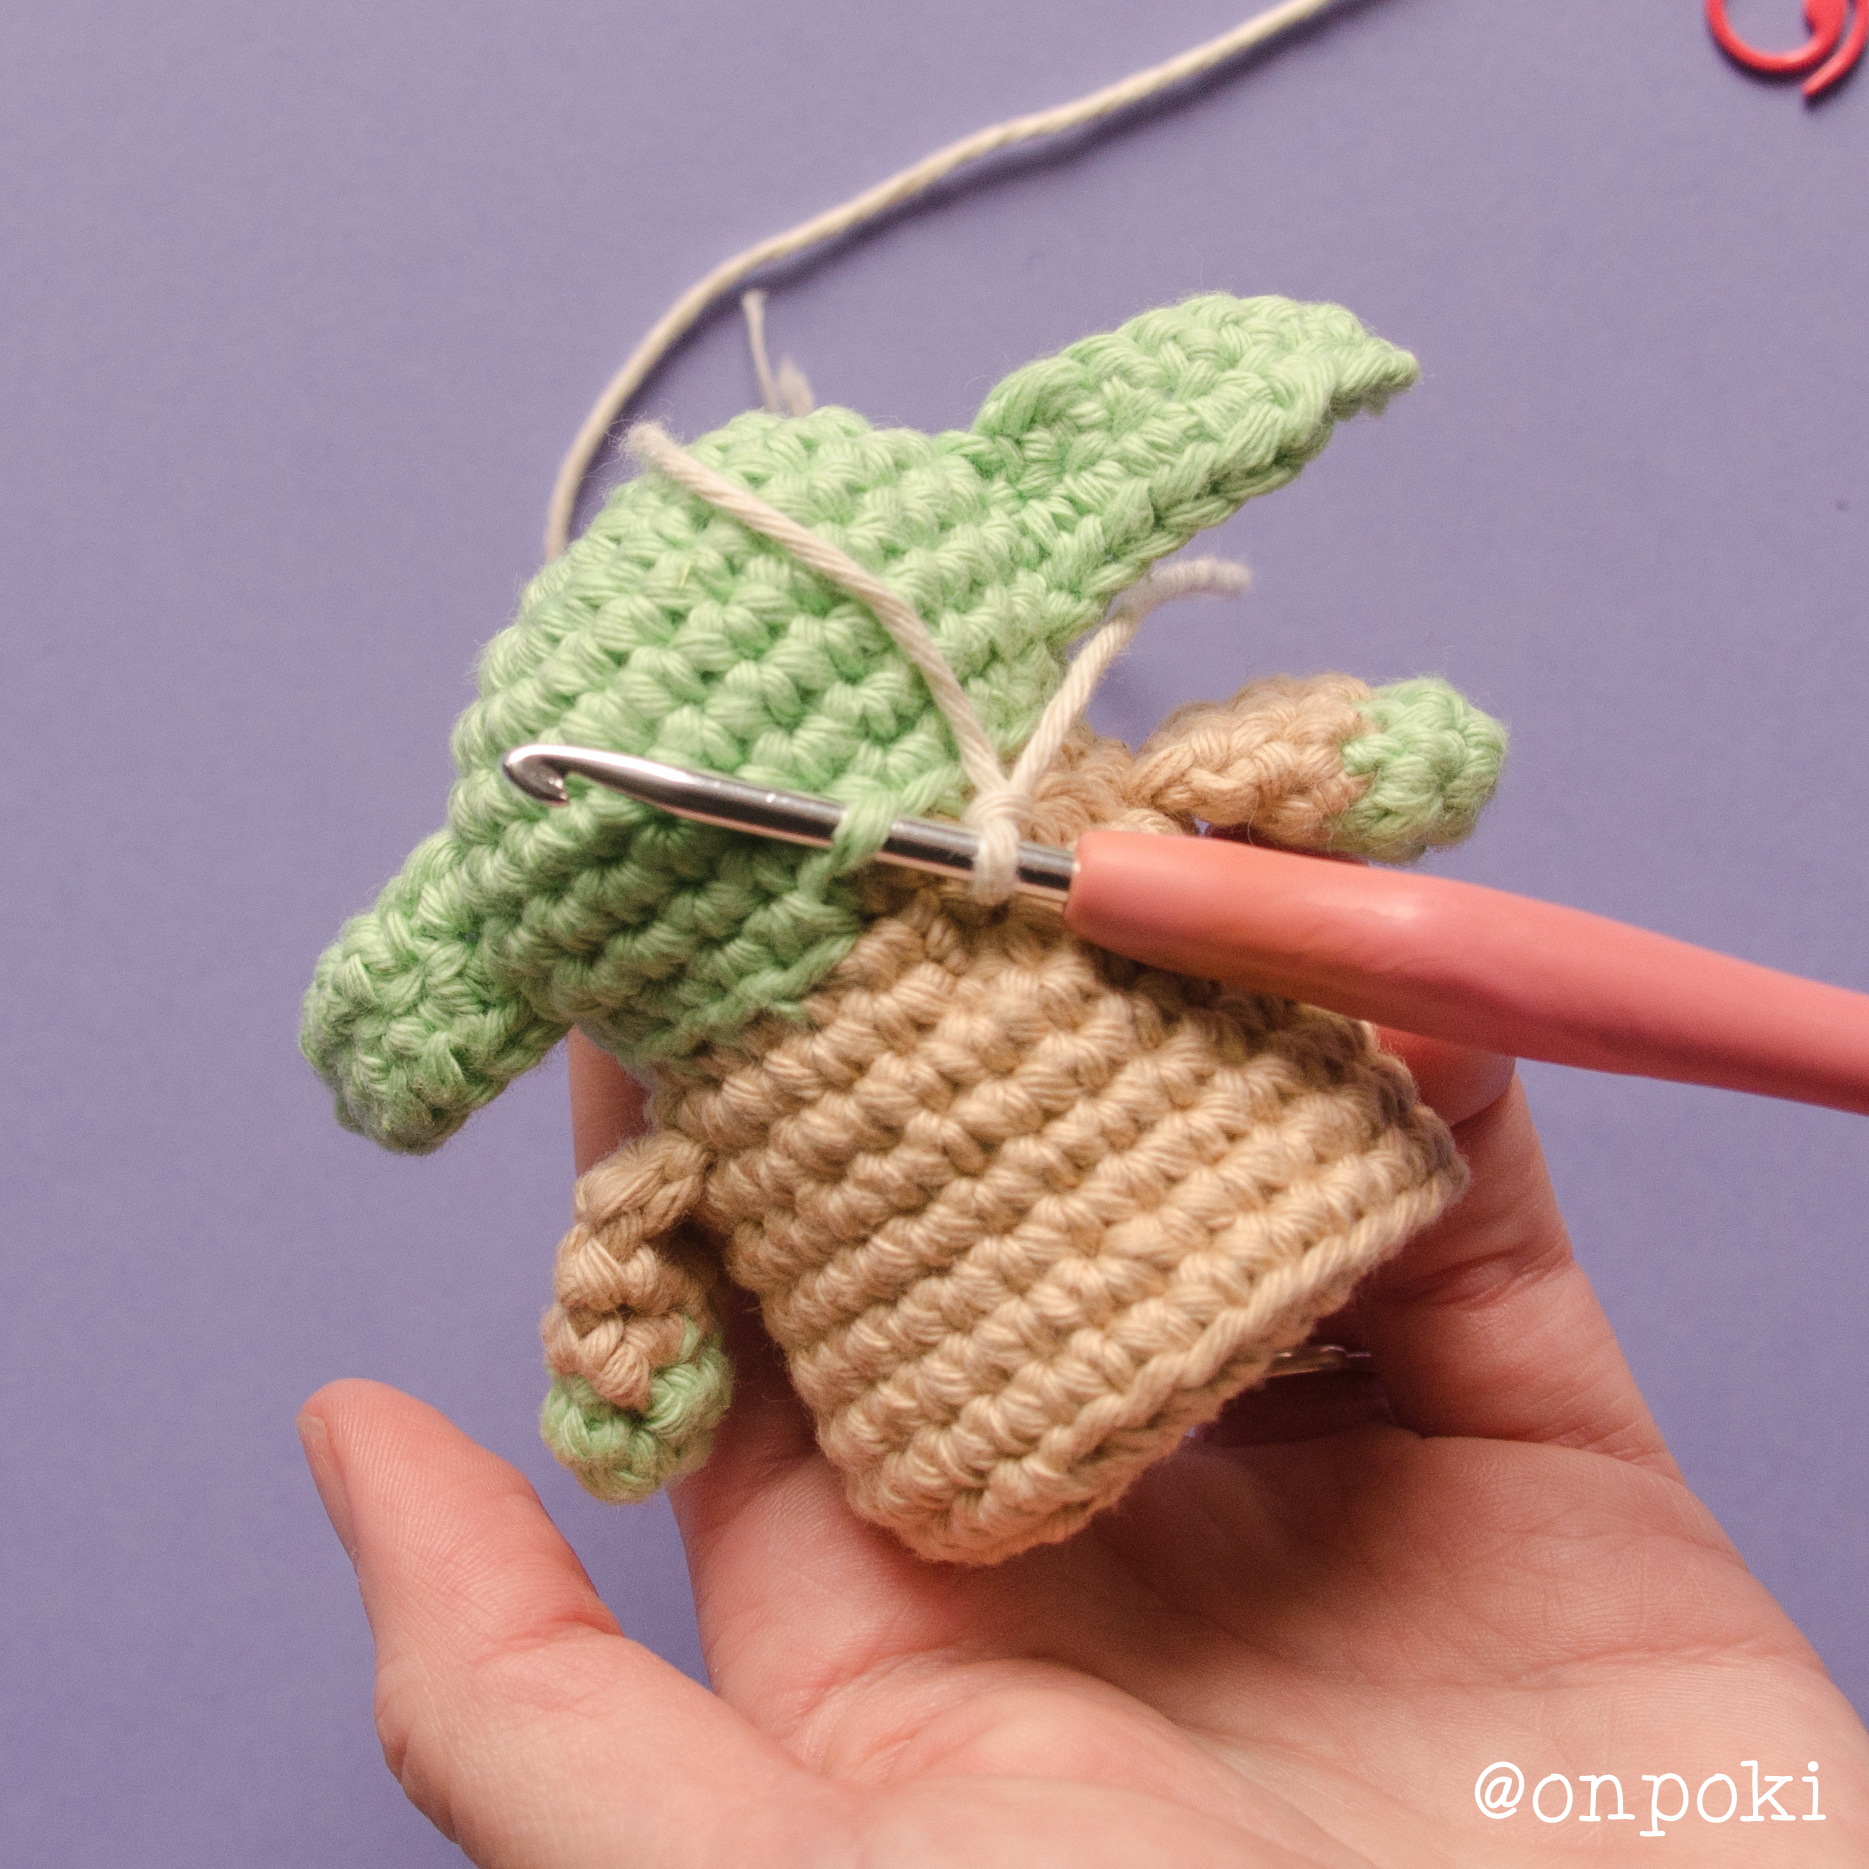
:: High Collar of the Coat ::
Using a 3.5 mm hook and the yarn for the collar colour
To make the high collar, we’ll use the front loops left visible from round 10 of the body.
Yarn over with a slip knot and start in the middle of the back so it looks neater.
Reminder: the stitches between < > are all worked into the same base stitch. In this case, they act as increases to shape the collar.
1) (1 sc, 1 dc) x2, <1 sc, 1 dc>, (1 sc, 1 dc) x2, <1 sc, 1 dc>, (1 sc, 1 dc) x2, <1 sc, 1 dc>, (1 sc, 1 dc) x2, <1 sc, 1 dc> (24)
2) (1 dc, 1 sc) x12 (24)
3) <1 dc, 1 sc>, (1 dc, 1 sc) x2, 1 dc, <1 sc, 1 dc>, (1 sc, 1 dc) x2, 1 sc, <1 dc, 1 dc>, (1 sc, 1 dc)x 2, 1 sc, <1 dc, 1 sc>, (1 dc, 1 sc) x2, 1 dc (28)
You can stop here if you want a short collar or add one more round if you prefer it a bit longer.
4) (1 sc, 1 dc) x14 (28)
Fasten off, cut the yarn and weave in both ends (the starting and the finishing one) into the inside of the collar.
Starting the high collar using front loops from round 10
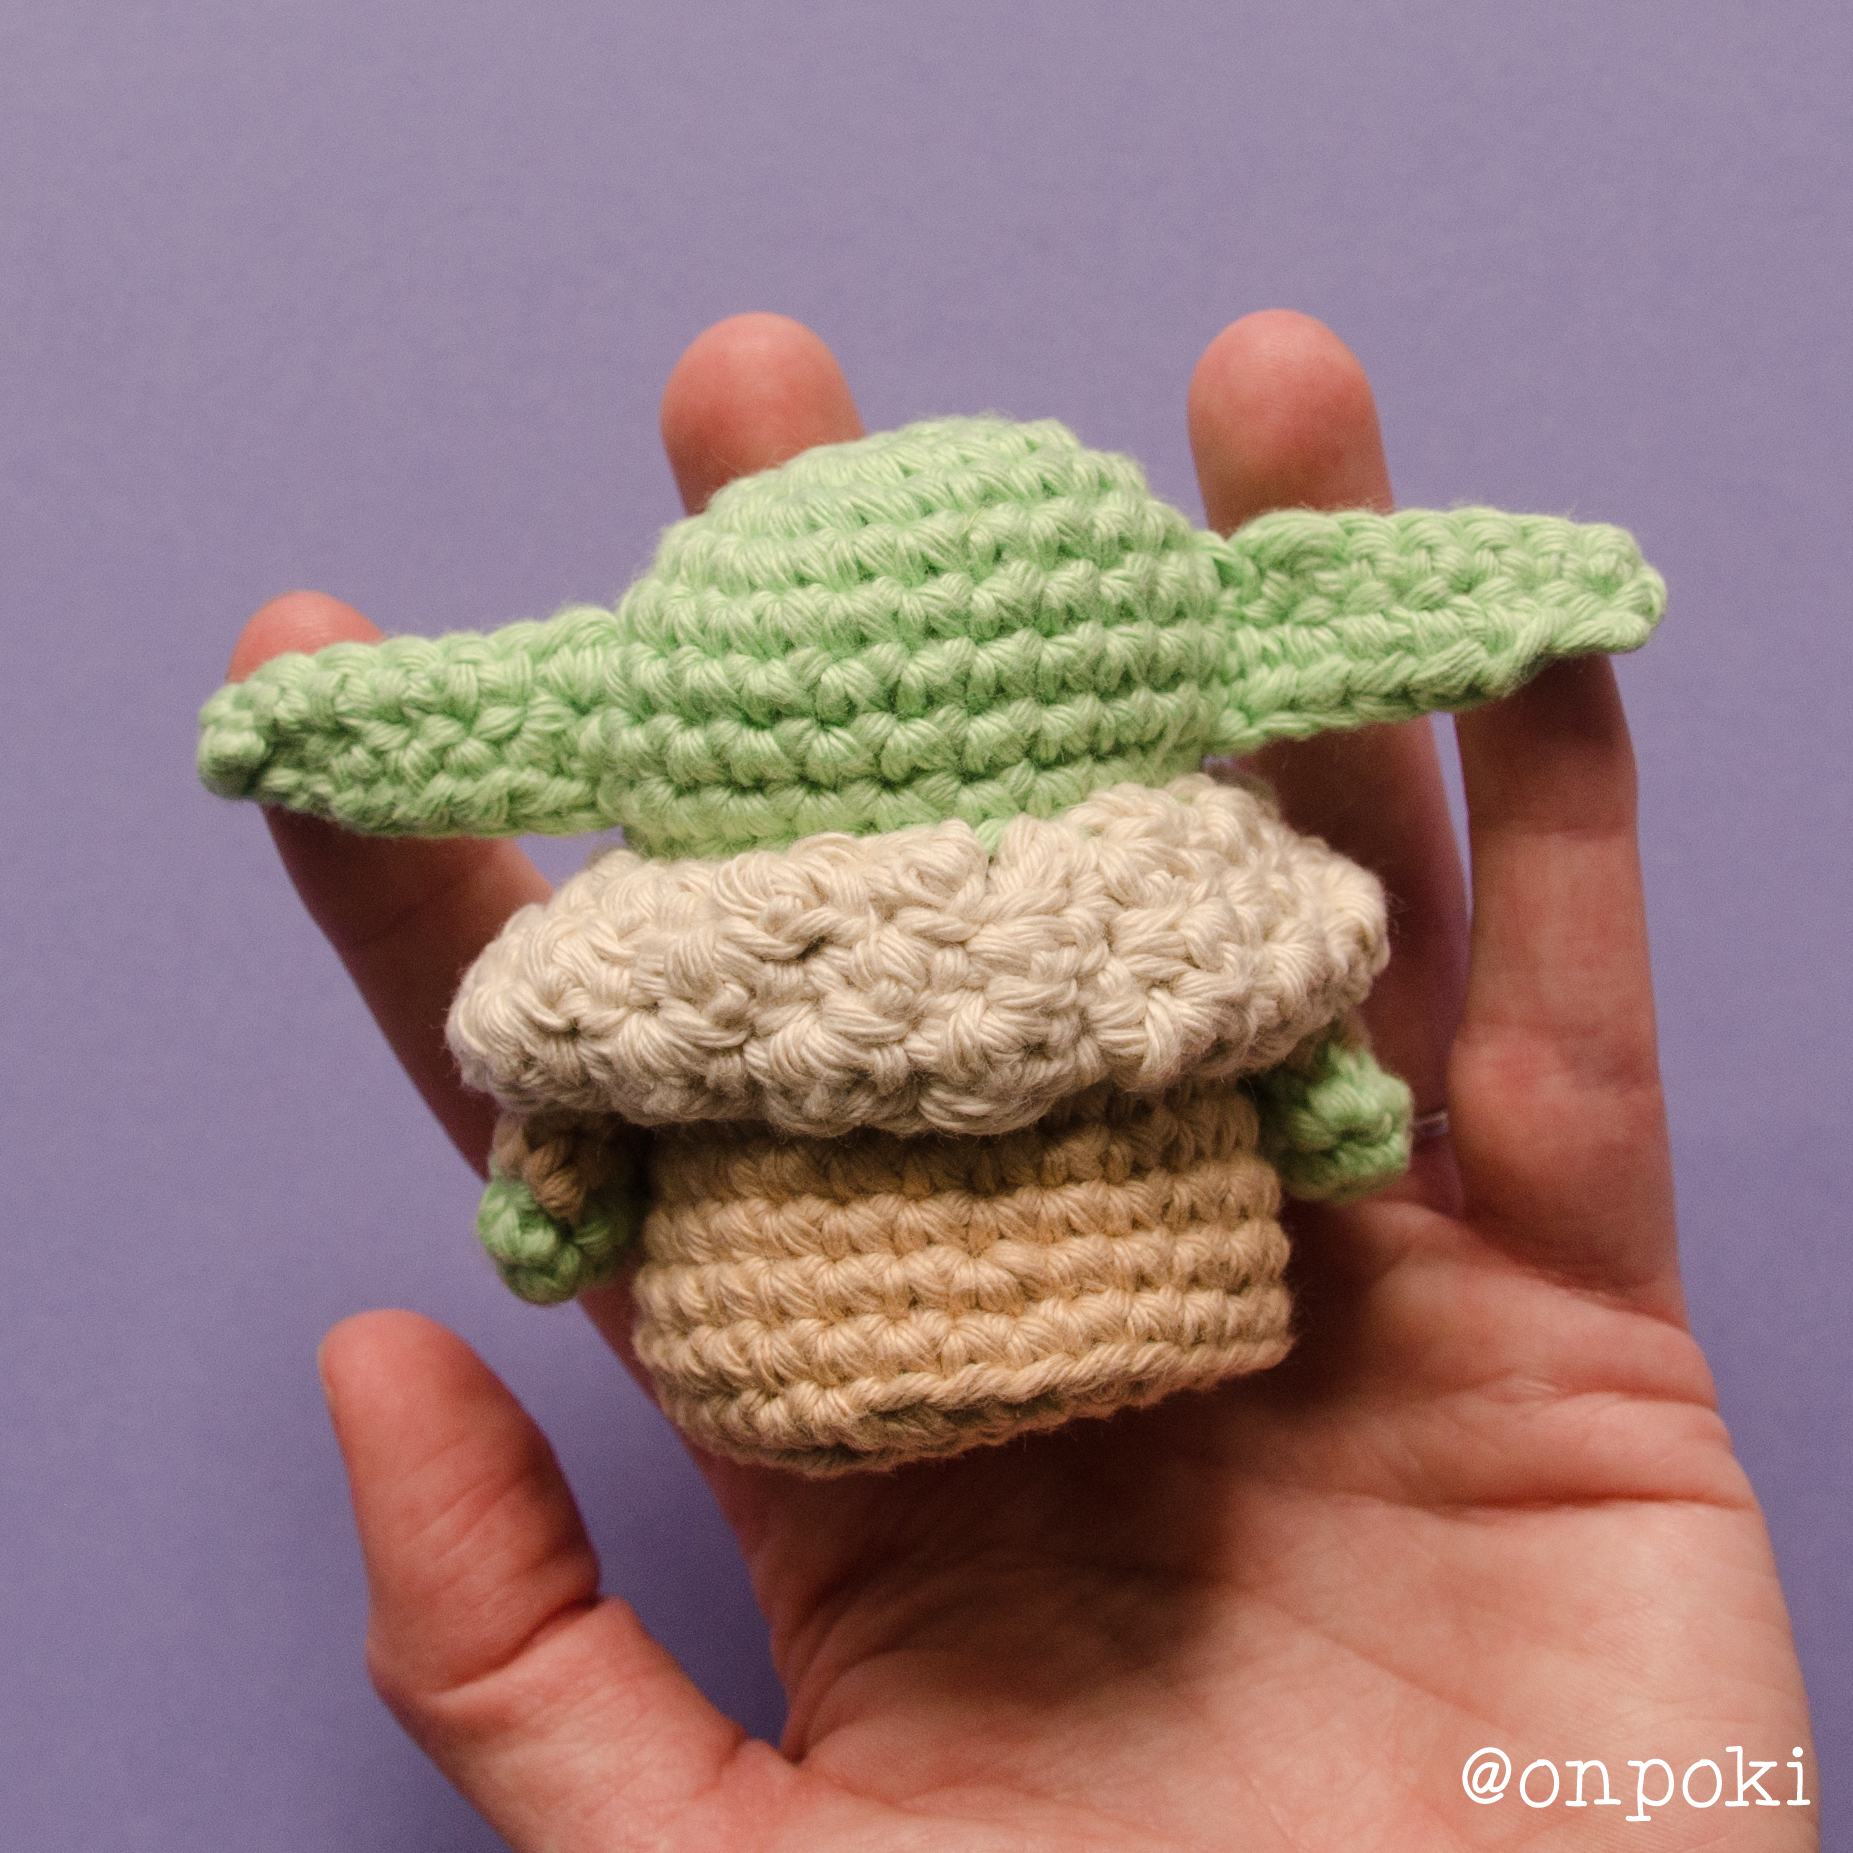
Back view of finished Grogu showing robe and ears
And with this, ladies and gentlemen, our mini Grogu is complete.
I really hope you enjoyed making him.
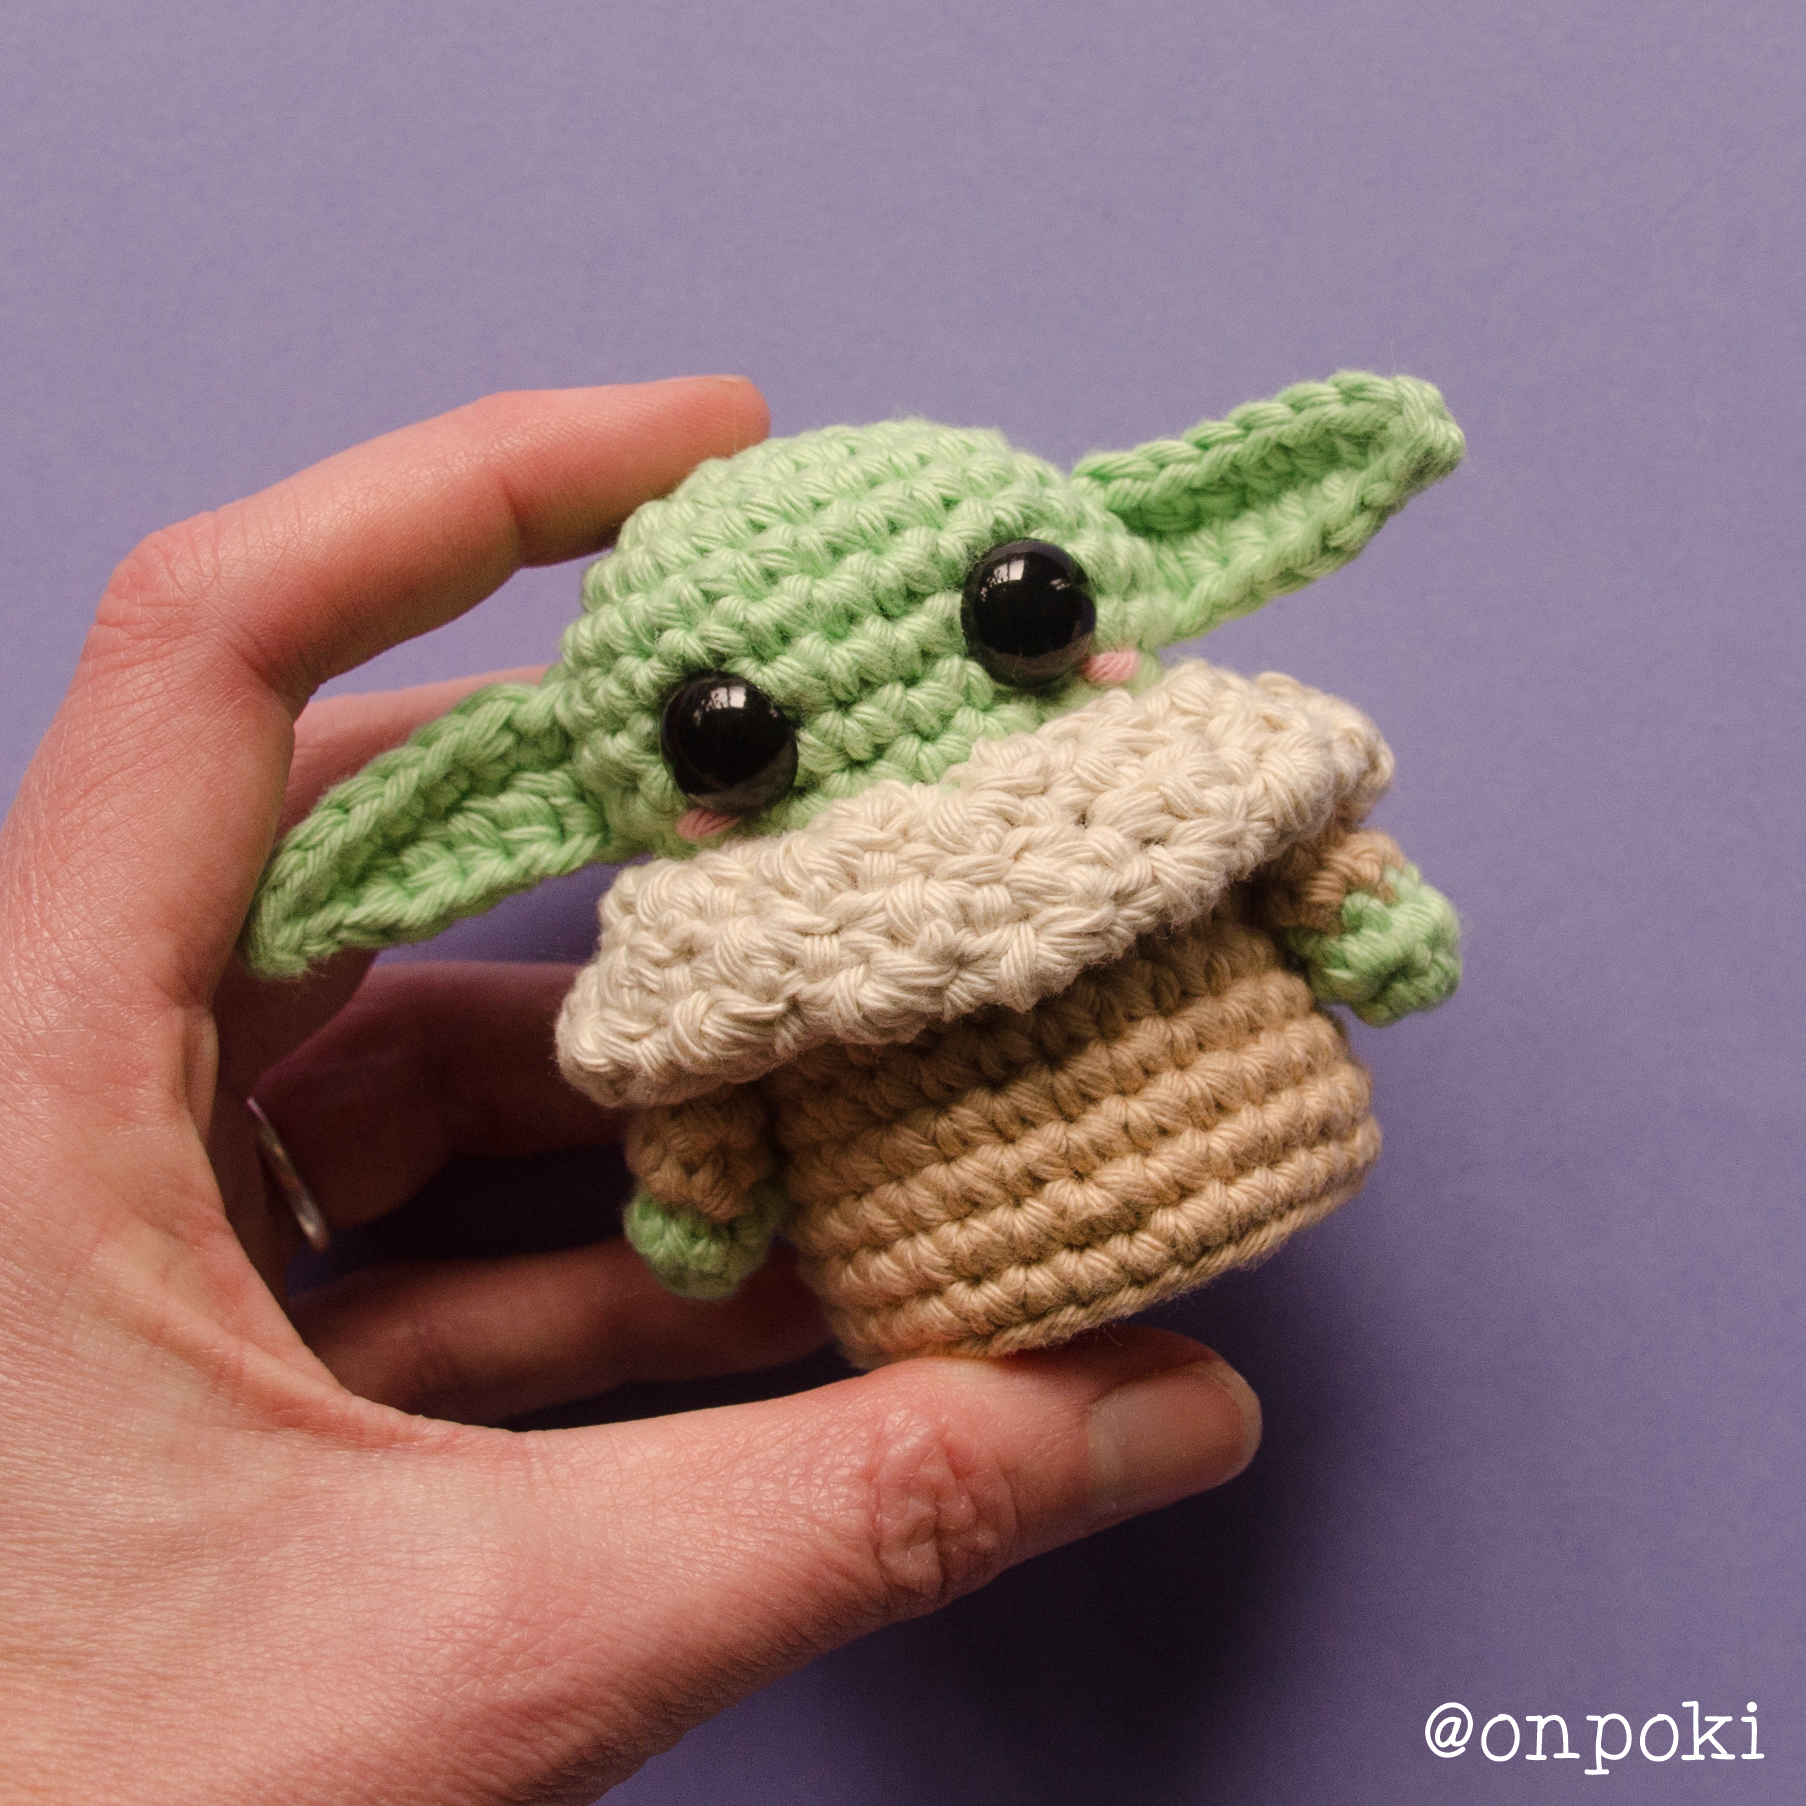
Front view of finished Grogu
Back view of finished Grogu with robe and ears
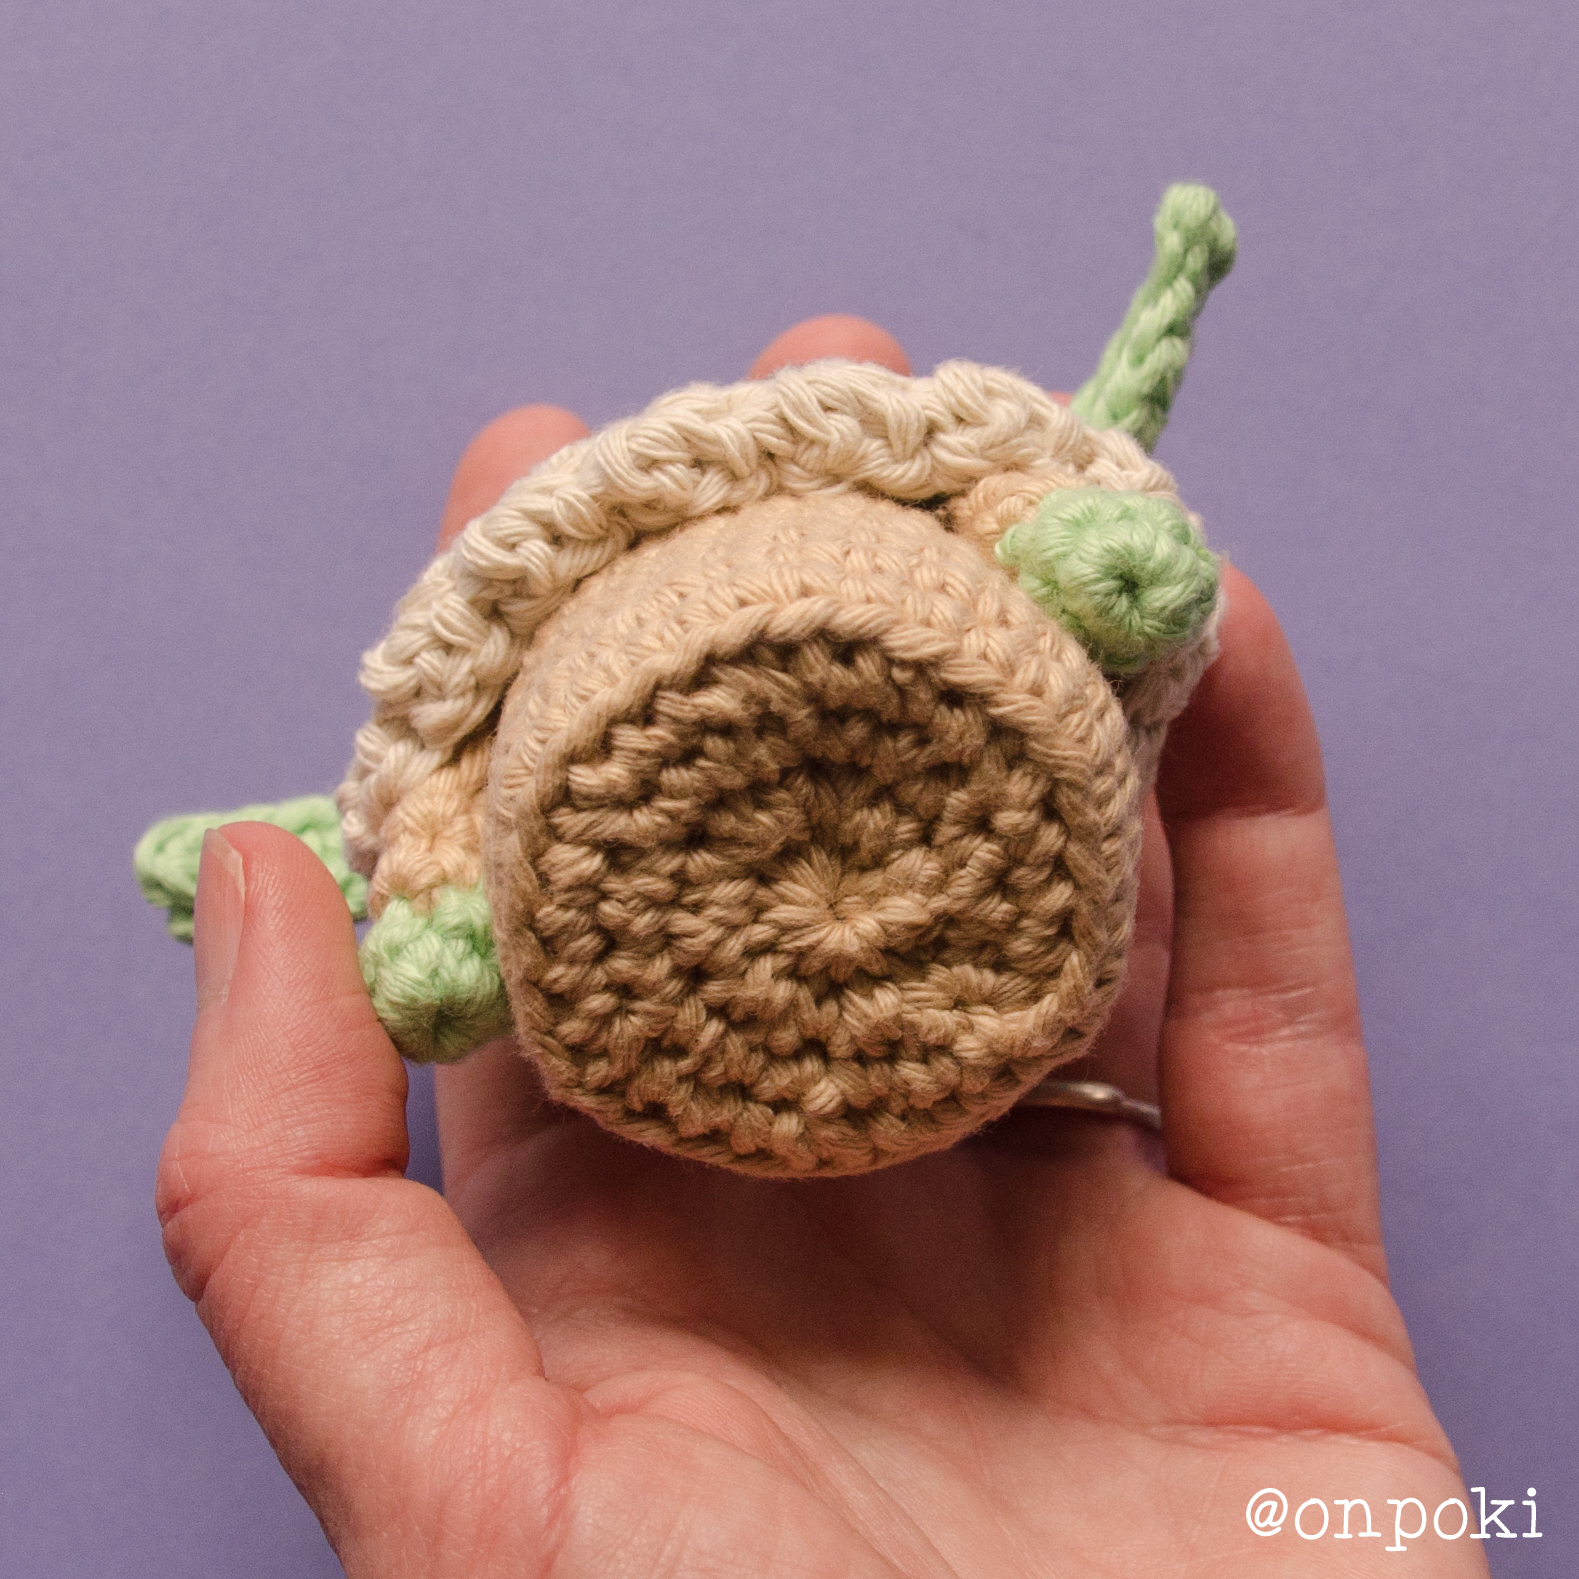
Bottom view of Grogu with flat base
I’d love to see how yours turned out! Please tag me @onpoki and use the hashtag #onpoki on Instagram or Facebook so I can see your creation.
Thank you so much for choosing one of my patterns. It truly means a lot.
With love, Paula…
If you enjoyed making this pattern and would like to support my work, you can do so here ☕

Pattern Copyright
© 2025 ONPOKI – Paula Fuentes – All rights reserved.
This pattern is for PERSONAL USE ONLY. You are not allowed to reproduce, publish (in print or digital form), share for free, modify, or resell the pattern, any of its parts, or its images.
You may sell finished items made from this pattern only if they are handmade by you and proper credit is given to the designer. Please include a note that says “Design by Onpoki” when selling at craft fairs, and add a link to my shop (onpoki.com) if selling online.
THANK YOU FOR CHOOSING MY PATTERN AND SUPPORTING MY WORK.
Find more of my free patterns here. Enjoy!
Hello! Ive been excited to make my own grogu amigurumi for a while and when i got around to it, i started with an arm but was confused when it turned out significantly shorter than its meant to be. The pattern only explains what to do up to round 4 but there appears to be possibly 5 or more in the image above the pattern. I haven’t been able to figure out a solution and would love to know if this needs correcting or if I need correcting haha.
Hi! First of all, thank you so much for choosing to make my Grogu pattern ❤️.
Yes, believe it or not, it really is only 4 full rounds. Buuuuuut, after round 4 there is almost one and a half extra rounds worked.
In the next instruction, after finishing round 4, you make 6 additional stitches (almost a full round), and then 3 stitches closing both sides. Those extra stitches are not written as full rounds, but they do add height to the arm, which is why it can look longer in the photo.
I hope this helps clarify it. If you need anything else, please let me know 😊
hey, I made this and love it!! I’m also curious what brand + color yarns you used bc I struggled to find the perfect colors for yoda…ended up using worsted weight (idk what the difference is really). I’m new to crocheting and found this a good project for a beginner, only struggled slightly with the ears lol
Hey!! I’m so happy you loved it… thank you so much for making him ^_^ ❤️
For this pattern I used Yarns and Colors Epic (aran weight). The colours were Birch, Limestone and Grass.
Lately I’ve been switching to Scheepjes Cahlista because it’s the only brand with a really beautiful and wide colour range that I can get in New Zealand. The closest shades I’ve found are Antique Mauve, Champagne and Apple Granny.
If you used worsted weight, that’s totally fine by the way… aran and worsted are very similar. Aran is just slightly thicker, but most of the time they work almost the same in amigurumi.
And yes… the ears 😅 they can feel a bit tricky at first. Once you understand why they’re shaped that way, they start to make more sense.
I got very confused on roung two of the head and body.The math doesn’t work out.
Hi Harry! Thank you for choosing my pattern 🙂
In round 2 the total should be 14 stitches.
You have 4 increases and 6 single crochet stitches. Since each increase counts as two stitches, that gives a total of 14 stitches at the end of the round.
Sometimes the confusing part is “1 inc in each of the next 2 sts”, because that actually creates 4 stitches, not 2.
Let me know if any part of the round still feels unclear and I’ll be happy to help.
I am confused with the collar. DC? Don’t you mean Inc.
can’t make anything off it. Sorry!
Hi! No worries at all 😊 yes, it is dc (double crochet), not an increase. I used this combination to give the collar a bit of texture.
It might feel a bit unusual at first, but once you get into the rhythm it should make sense. I’ve definitely had moments where I overthink a pattern and assume something is wrong, and then realise it was just me overthinking it 😅
If you need help with anything else, feel free to ask! I hope you’re enjoying making your Grogu 💚
I am sorry. I changed dc with dec lol. Thanks for clearing up. 👍🏻
I’m fairly new to crochet and made my Grogu this weekend. I am absolutely in love with him. He’s so cute. Thank you so much for posting this pattern. It was very easy to understand and the photos made the instructions even clearer. Fabulous!
Aww, thank you so much!
I’m so happy to hear your Grogu turned out cute and that you enjoyed making him! It honestly means a lot to know the pattern was easy to follow, especially for someone fairly new to crochet. That’s exactly what I hoped for when putting it together.
Thank you again for taking the time to leave such a lovely comment. It truly made my day ❤️
I’m also kinda confused on row two of the head and body, I do an increase and then 3 single crochet, and then I’m left with only two stitches to crochet into, I don’t have the room for the additional 3 single crochet and the final increase in the row
Hi! First of all, thank you so much for choosing my pattern and for taking the time to message me 💚
The stitches inside the < > are all worked into the same base stitch. So in round 2, when you see <3 sc>, you place all 3 single crochets into ONE stitch, not across 3 separate stitches.
I hope that helps! And please feel free to message me again if you need any more help, I’m always happy to help.
Yes that helps so much thank you! I think that’s the first time I’ve seen that in a pattern lol
This came out so cute! Thank you for sharing it!
Yay! So happy you liked it… thank you so much for making him! ❤️